I've recently started catching up with all the blogs that I've wanted to write and have had flagged to write for a long time. This one I have had flagged since 26 January 2016.
I like building .net libraries and use Ghost Doc all the time to help me generate my documentation.
Using Ghost Doc
Before just jumping in let's see a little about what Ghost Doc is. First of all Ghost Doc as a lot of features and I would encourage you to visit their products page to see all of them.
Using the default shortcut of ctrl + shift + D you can add a basic comment to your code that generally only needs a little repair to make it properly human readable. Take this very basic add method for example
Using the Ghost Doc shortcut I can generate some basic docs that would look like this
As you can see the default comments are very readable so in this case I'll use that comment as is .
Spell Check
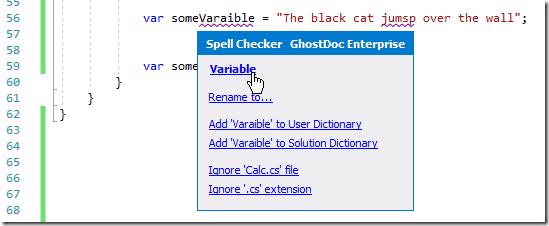
Ghost doc also installs with a spell checker which I love because my spelling is terrible at the best of times. Other spell checkers that I've used in the past in Visual Studio only check obvious things like string literals but Ghost Doc checks a whole lot more for example in variable names
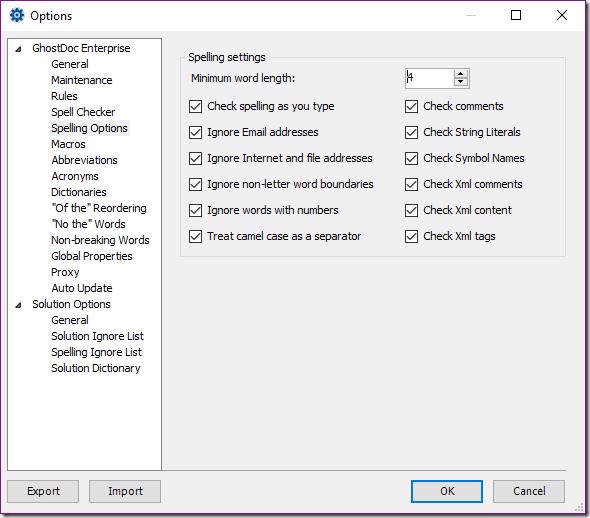
Note how it splits the casing on the variable to know where each word is and you can correct your spelling with a single click on the mouse . You can configure what you want the spell check to work for in the options menu
With this extension installed opening other peoples code you very quickly notice typos that you would normally not .
Generating documentation with Ghost Doc
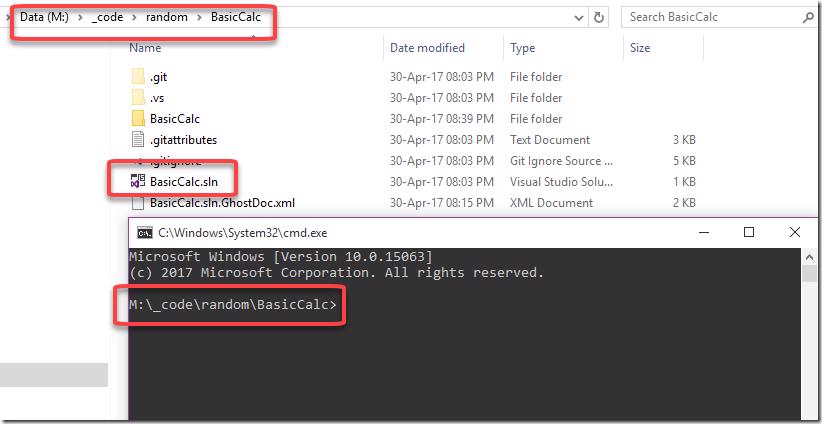
So this posts primary focus is on how to generate documentation with Ghost Doc so let's see how that works. First off you'll need to have Ghost Doc installed obviously . Next open a cmd window and change directory to the directory where you have a solution with existing xml comments
Now all you have to do is run the cmd tool, passing in the solution file and a couple of other parameters
This will generate some output into the console because we specified the /consoledetailed flag
You will need to install HTML Help Workshop which you can get from Ghost Docs site.
Now that will create a Help folder and inside it a .chm file
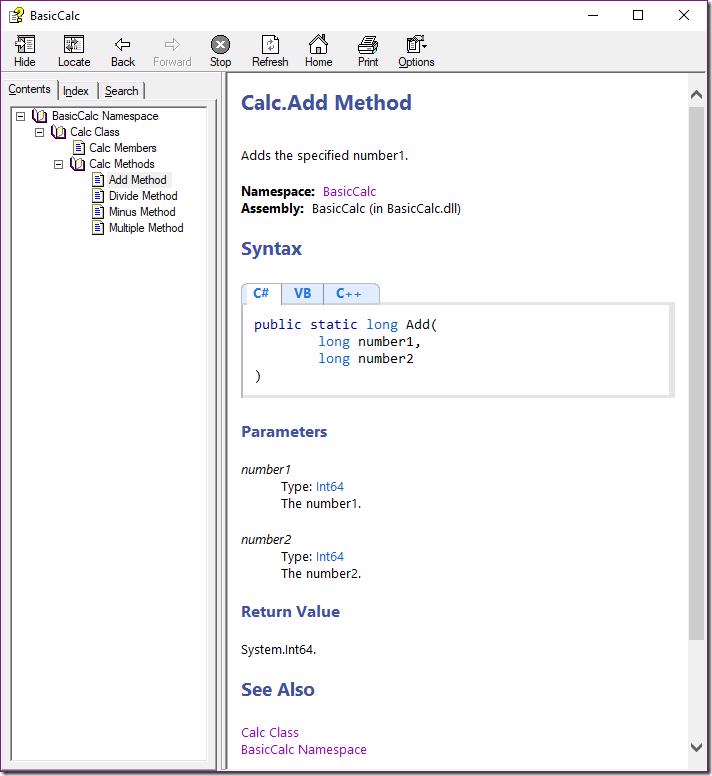
We can open that file and you will notice that all our comments have been formatted nicely into what looks like the old msdn style documentation
Ghost Doc generates to other formats as well as you would see on their editions compare page
We now have a chm that we can distribute with our source .
Adding this to our CI
Generating docs from your machine is ok but then you have to remember to do it and what's worse is that you'll have to check that file into source control (Emphasis on the Source in source control ) which wouldn't be great. So naturally as Donovan Brown reminds us "anything you can do on a command line you can do in VSTS or TFS"
.
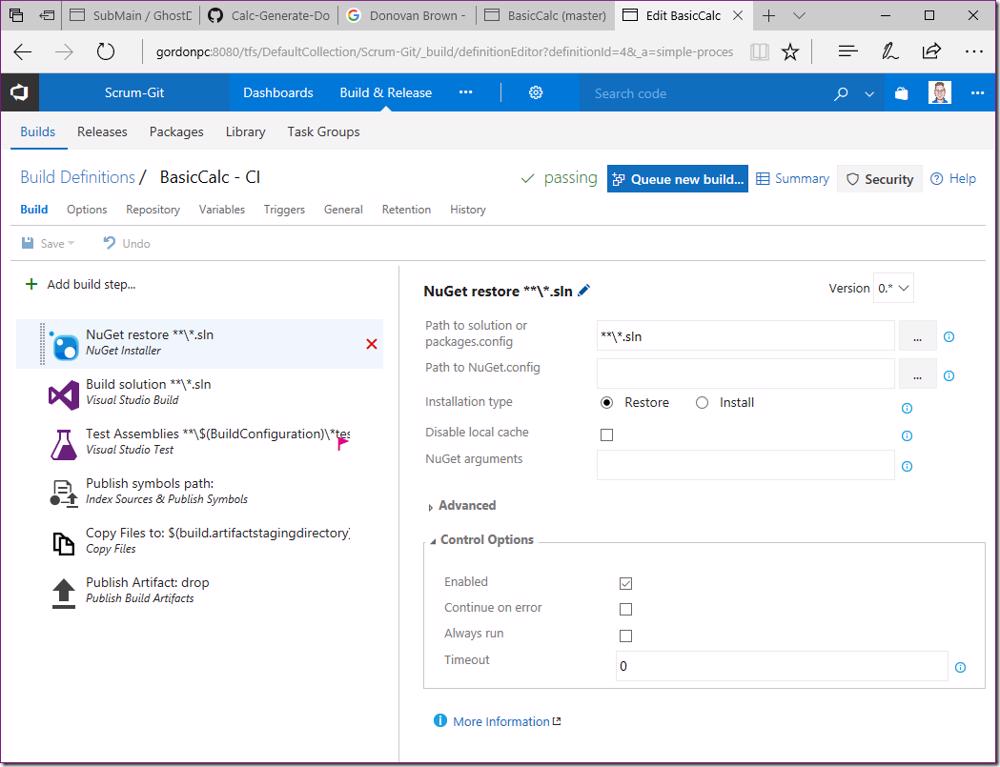
I've gone ahead and setup a standard CI build using the built in Visual Studio template.
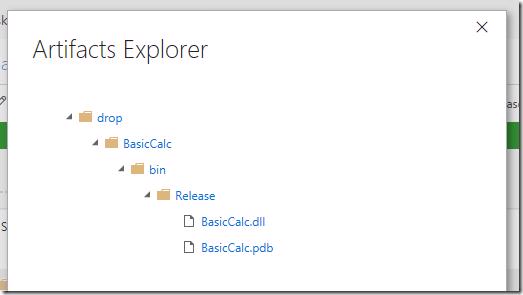
If we look at the current build artifacts you will notice that only our class library and pdb is being published
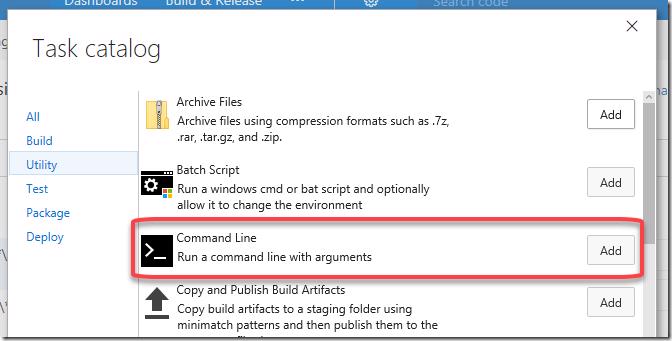
To add the help file to this we are going to do a couple steps. First add Command Line task
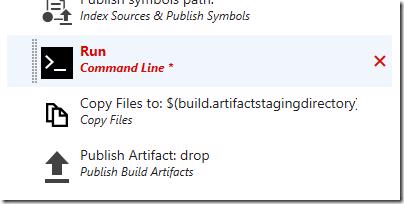
and place it before the Copy Files to: $(build.artifactstagingdirectory) task
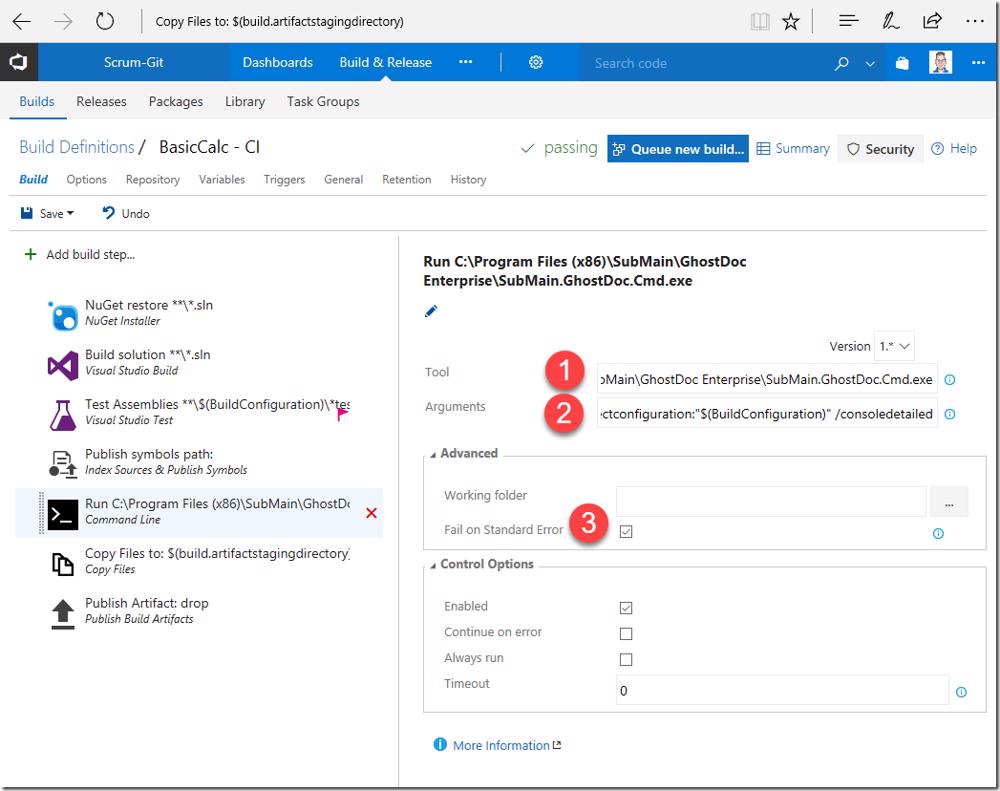
Now we need to update a couple values for the task
- Set the Tool to "C:\Program Files (x86)\SubMain\GhostDoc Enterprise\SubMain.GhostDoc.Cmd.exe"
- Set Arguments to "/solution:"BasicCalc.sln" /helpConfiguration:"HelpFile" /projectconfiguration:"$(BuildConfiguration)" /consoledetailed"
- Note that we are specifying $(BuildConfiguration) as the configuration so docs are generated for the configuration we are specifically building
- Check the Fail on Standard Error checkbox
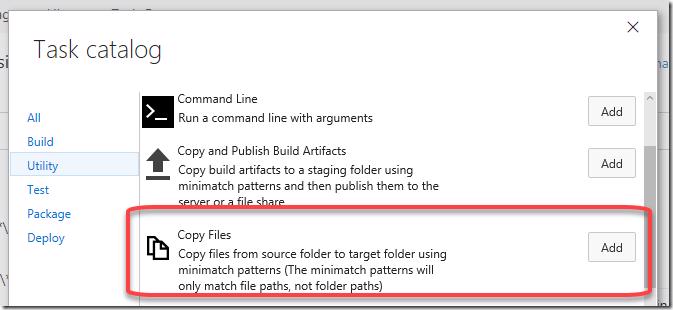
Now add a Copy Files task
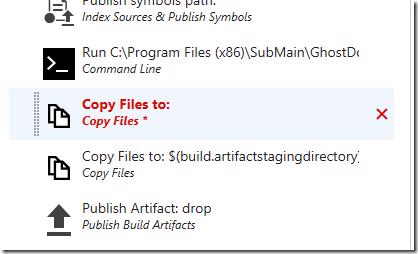
and add this below the Command Line task
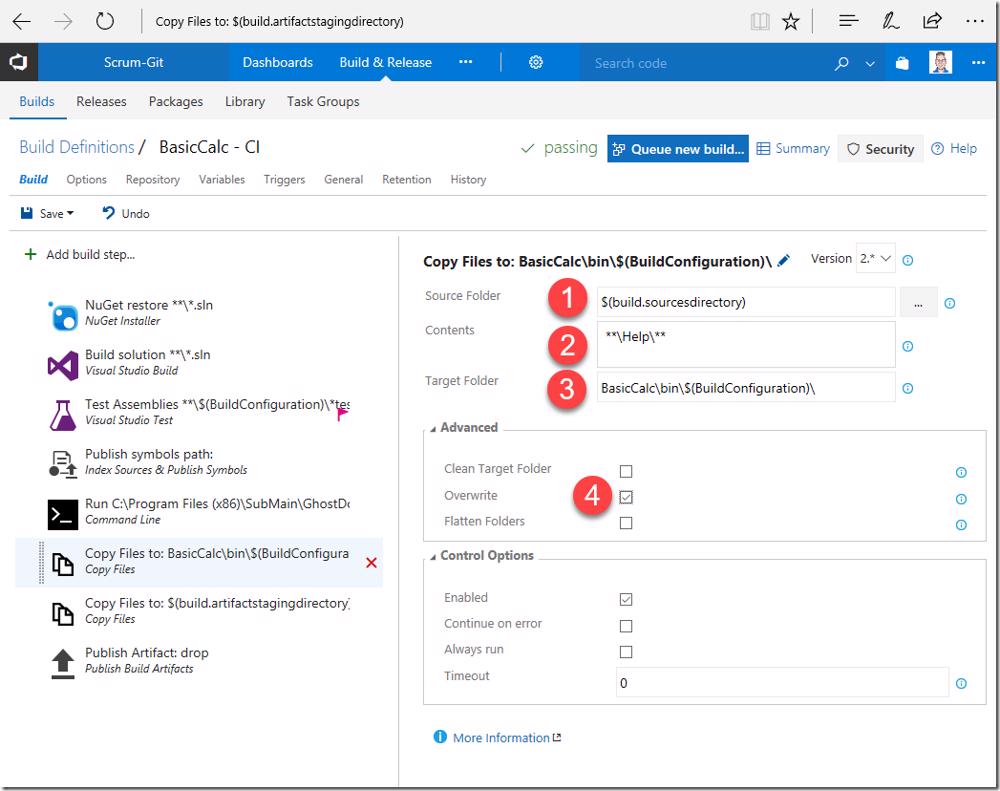
and now Set
- Source Folder to "$(build.sourcesdirectory)"
- Contents to "**\Help\**"
- Target Folder to "BasicCalc\bin\$(BuildConfiguration)\"
- And Check the Overwrite checkbox
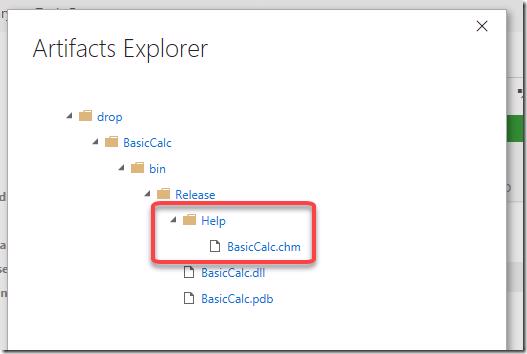
If we click Save and run this build you will notice that after the build runs we have our help file in the drop
We are not guaranteed to always have up to date source documentation with our build outputs.
Conclusion
If you write libraries either for internal or external use using the xml comments I'd highly recommend you take a look at Ghost Doc as it makes your life really easy. Also with the very powerful Visual Studio integration developers will be a lot more productive and really have no excuse not to generate meaningful documentation for your class libraries.
Happy documenting
