Today I played with a new .net core template just to see what the authentication options were out the box and was surprised to see just how easy it is to go from nothing to having a base project that has authentication fully baked in with 2 factor authentication and email verification.
In this post we'll cover
Setting up a new .net core project with local app users
Enabling email verification
Setting up 2 factor authentication
Let's get started
#Setting up a new .net core project with local app users
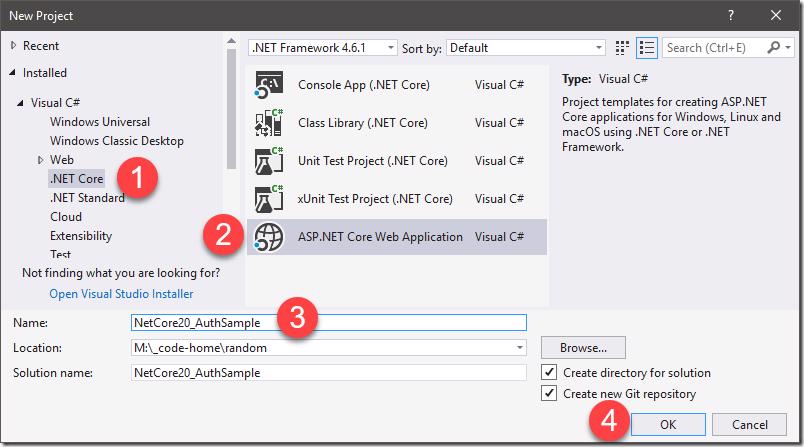
This first part is just setting up a new .net core 2.0 making sure you select the local app users option for security, start off by creating a new project
Under the .NET Core Project section
Select ASP.NET Core Web Application
Enter a name for your app
Click OK
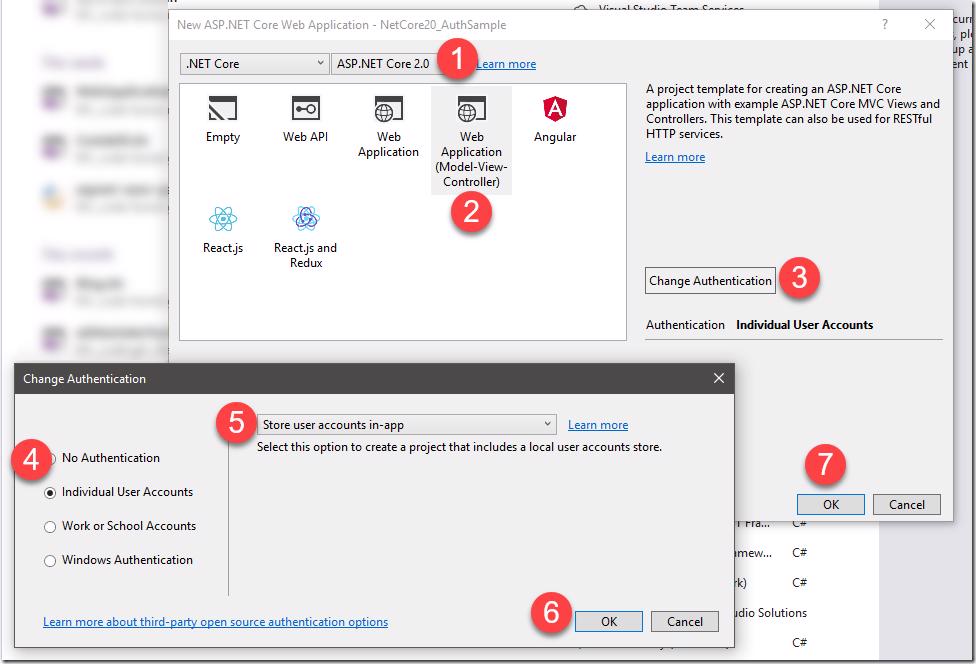
New ASP.NET Core Web Application
Next we'll select the project and authentication options, for this example we'll
Select ASP.NET Core 2.0
We'll use a Web Application using the Model-View-Controller template
Click Change Authentication
Select Individual User Accounts
Then from the drop list make sure Store user accounts in-app is selected
Click OK
Click OK
ASP.NET Core Project Configuration - Individual User Accounts
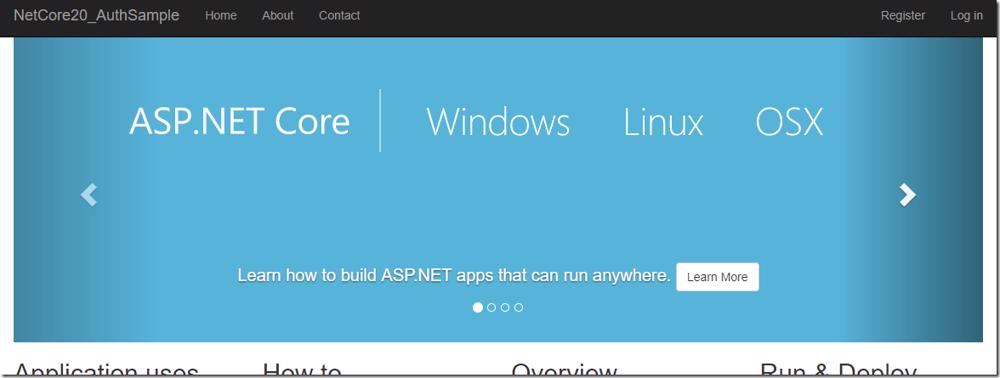
Congratulations you have done no work and have a fully working template project 😁.
New ASP.NET Core App Running
Luckily the rest of this can be done following posts that are conveniently located in the project, we don't even have to Google for answers 🙂.
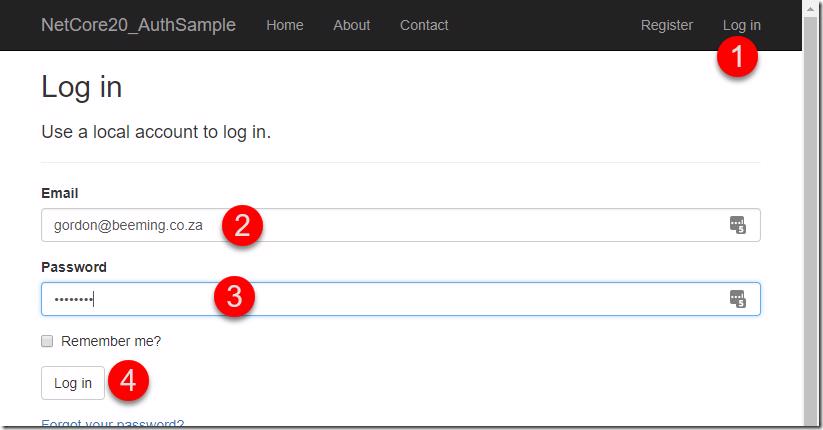
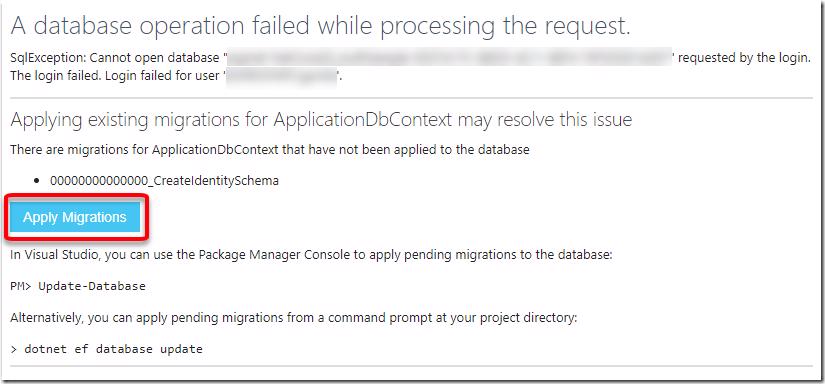
We just need to run migrations now, for this we are just going to attempt to login
Click Log in
Enter a email address
Enter a password
Click OK
Application Login Page
We'll get the new improved not yellow screen of death, click Apply Migrations
Apply Database Migrations
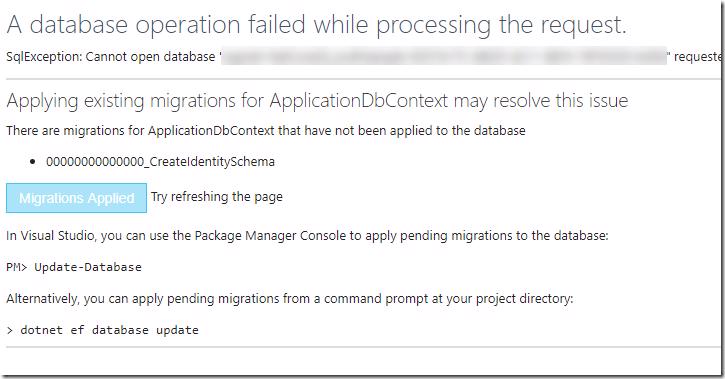
After a short while the screen will indicate that you can refresh and migrations should be applied
Database Migrations Applied
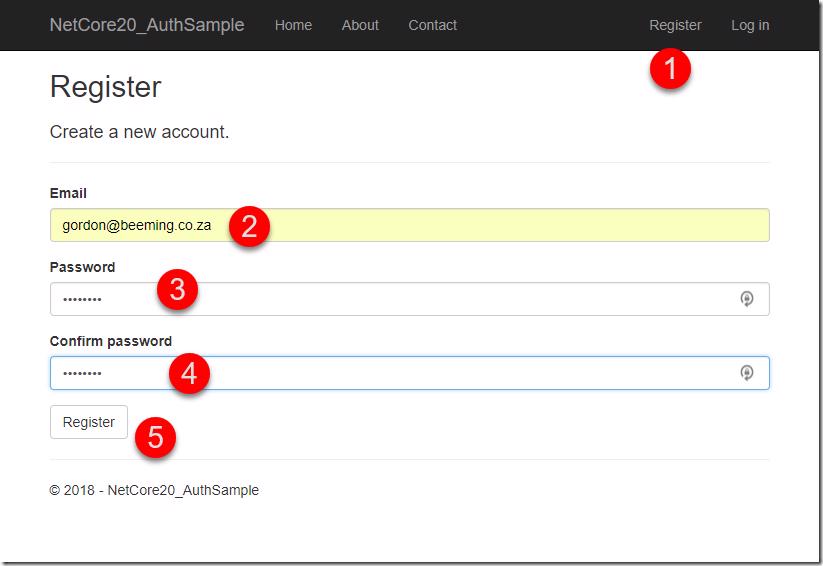
After that migrations would have been applied. We can test this by registering a new user
Click on Register
Enter an email address
Enter your password
Re-enter your password
Click Register
Application Registration Page
You are registered, of course at the moment you were not asked to verify your email address because we haven't enabled that yet.
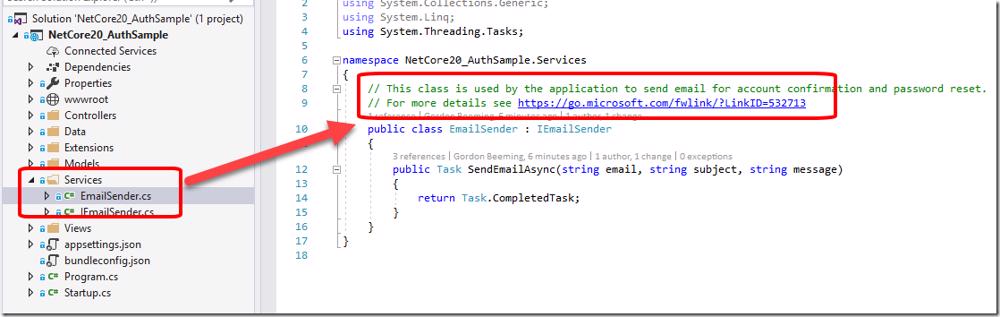
The link for enabling email verification can be found in the EmailSender.cs file under the Services folder. If you want to follow the official documentation for this section you can use the link https://go.microsoft.com/fwlink/?LinkID=532713, alternatively you can follow here where you might get some extra hints
EmailSender.cs in Solution Explorer
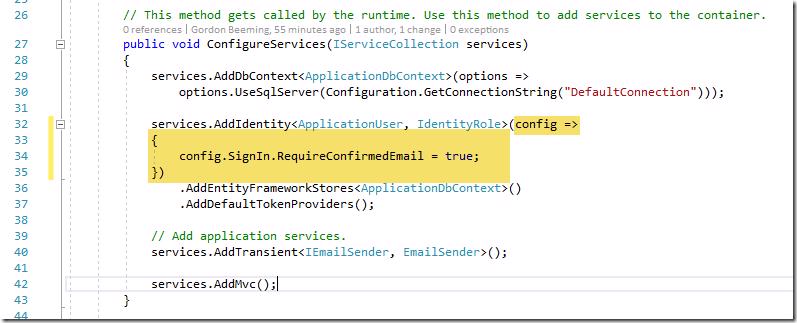
Start off by going to the Startup.cs file and adding the following code to the ConfigureServices method
Adding IEmailSender in Startup.cs
Under the services folder add a new file called AuthMessageSenderOptions.cs with the contents
AuthMessageSenderOptions.cs
public class AuthMessageSenderOptions{ public string SendGridUser { get; set; } public string SendGridKey { get; set; }}
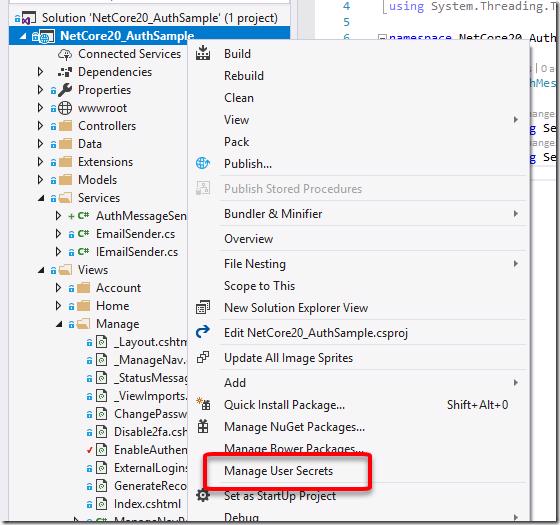
Now right click on the project and click on Manage User Secrets
You can now add the SendGrid nuget package with the command Install-Package SendGrid. Next go to the EmailService.cs file and replace the class with the below
EmailSender.cs
public class EmailSender : IEmailSender{ public EmailSender(Microsoft.Extensions.Options.IOptions<AuthMessageSenderOptions> optionsAccessor) { Options = optionsAccessor.Value; } public AuthMessageSenderOptions Options { get; } //set only via Secret Manager public Task SendEmailAsync(string email, string subject, string message) { return Execute(Options.SendGridKey, subject, message, email); } public async Task Execute(string apiKey, string subject, string message, string email) { var client = new SendGrid.SendGridClient(apiKey); var msg = new SendGrid.Helpers.Mail.SendGridMessage() { From = new SendGrid.Helpers.Mail.EmailAddress("my-app@beeming.co.za", "My App"), Subject = subject, PlainTextContent = message, HtmlContent = message }; msg.AddTo(new SendGrid.Helpers.Mail.EmailAddress(email)); var result = await client.SendEmailAsync(msg); if (result.StatusCode != System.Net.HttpStatusCode.OK) {#if DEBUG var error = await result.Body.ReadAsStringAsync(); throw new Exception(error);#else throw new Exception("Unable to send email!");#endif } }}
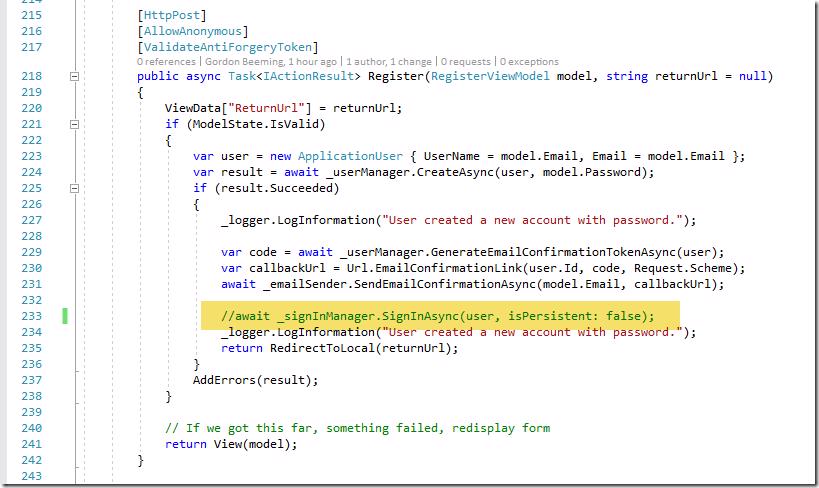
Open AccountController.cs and find the below line in the Register post method and comment it out or delete it. This will mean that when someone new registers we won't auto log them in
Comment out auto sign-in in AccountController.cs
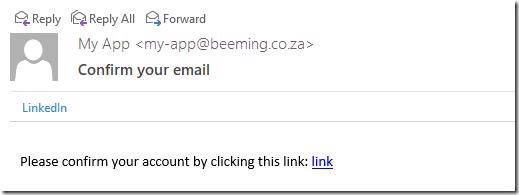
That should be all you need to do. Test this by signing up using the register page and see if you get an email
Email Verification Email
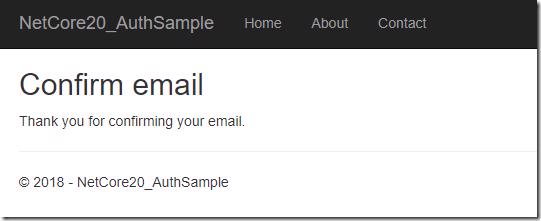
After clicking of the link you should be shown a page saying that your email address is verified
Firstly it's important to note that 2 factor auth is supported with no changes but this section addresses adding the QR Code to the 2 factor auth page
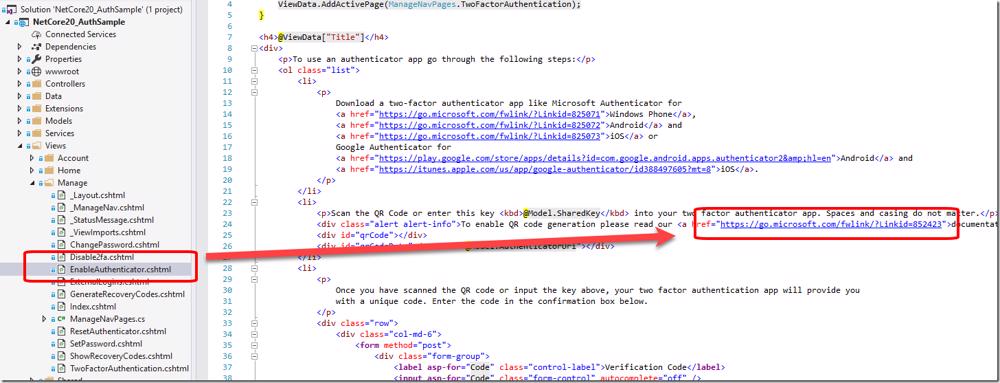
The link for enabling 2 factor authentication can be found in the EnableAuthenticator.cshtml file under the Views/Manage folder. If you want to follow the official documentation for this section you can use the link https://go.microsoft.com/fwlink/?Linkid=852423, alternatively you can follow here and do it 'right'.
EnableAuthenticator.cshtml in Solution Explorer
Now obviously with software development there is never really a right way but some solutions feel less dirty and are therefore more right 😜. Where this example will differ from the official docs is that we are going to use bower for the reference we adding instead of downloading the file and storing it in our source control.
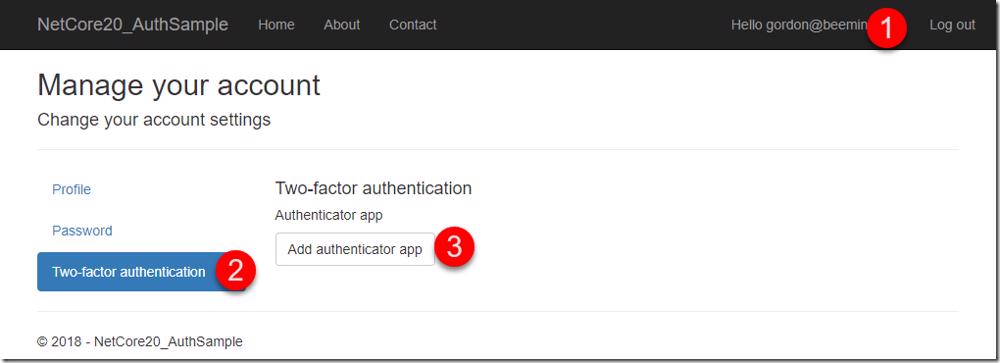
The default experience can be seen by
Clicking on your profile name
Clicking on Two-factor authentication
Clicking on Add authentication app
User Profile - Two-Factor Authentication
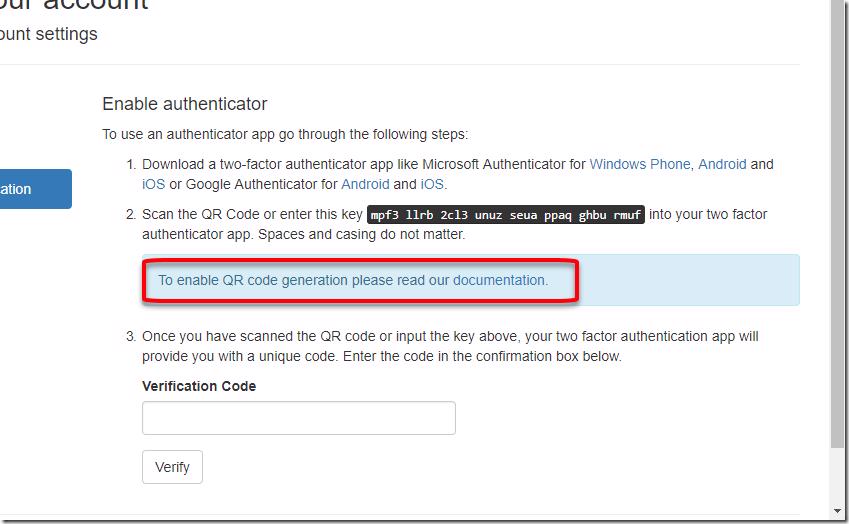
You will see here that you are given a code that your are required to type in and a message for how you can add a QR Code
Enable Authenticator - Manual Code
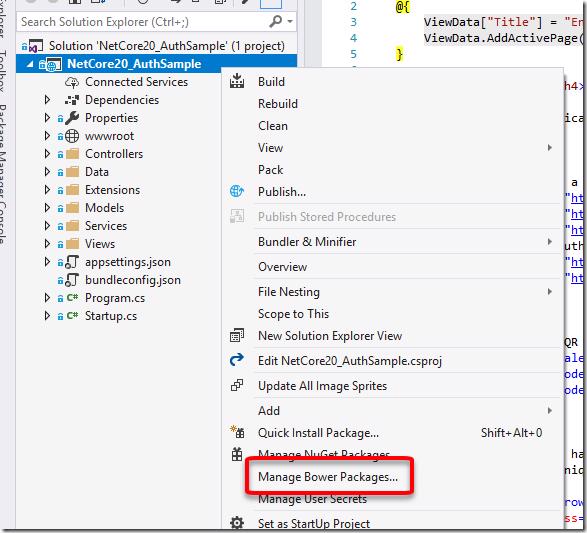
Start off by right clicking on the project and going to Manage Bower Packages...
Manage Bower Packages in Visual Studio
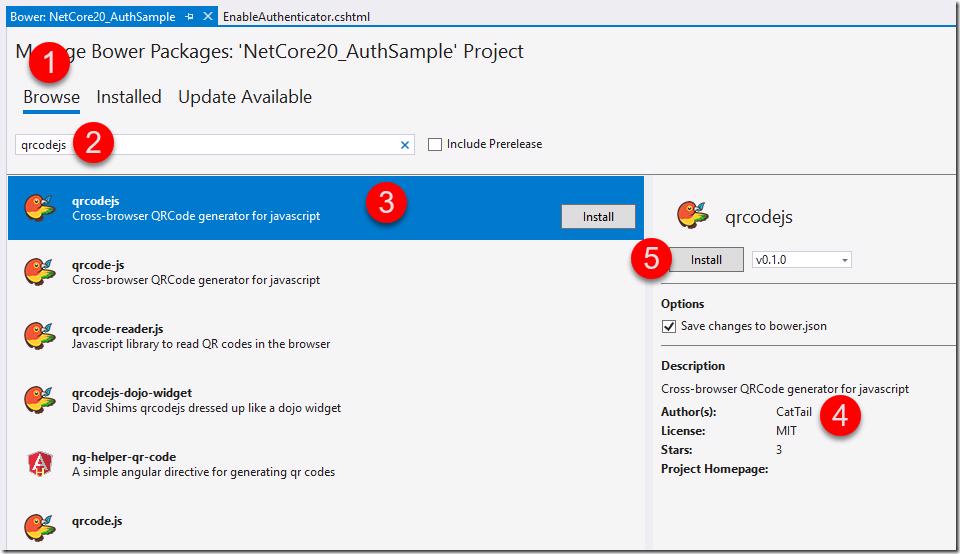
Next we need to
Click on the Browse tab
Type qrcodejs into the search box
Click on the first option
Which should be by the author CatTail and
Click Install
Bower Package Manager - qrcodejs
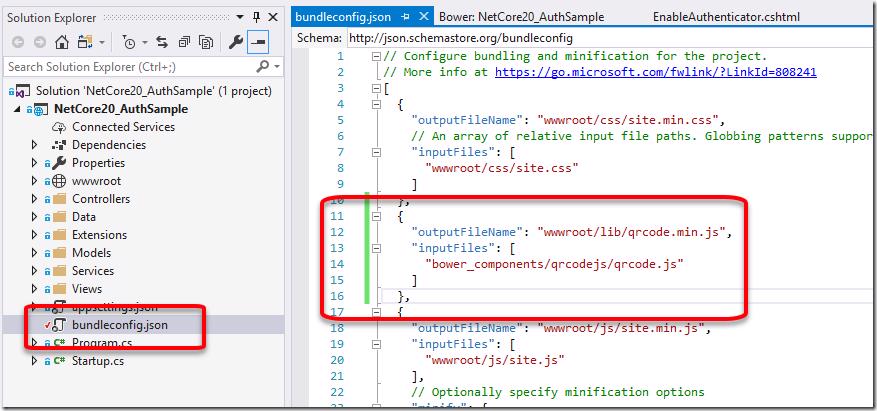
Next open the bundleconfig.json file and add the following config
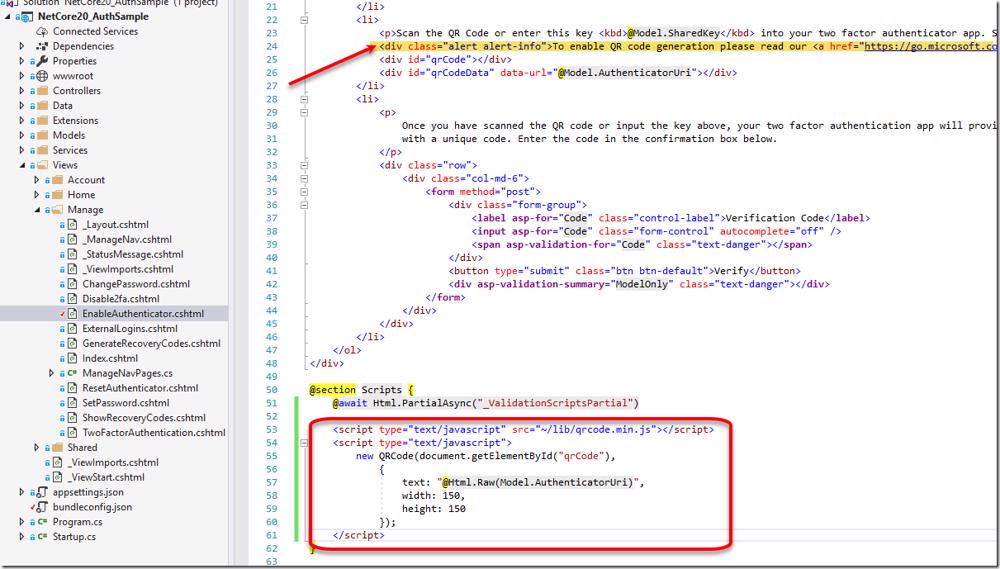
Now we have 1 small bit of configuration left, open EnableAuthenticator.cshtml mentioned above and add the below code to the script section...you can also remove line 24 which is what shows the info message on how to setup the QR Code.
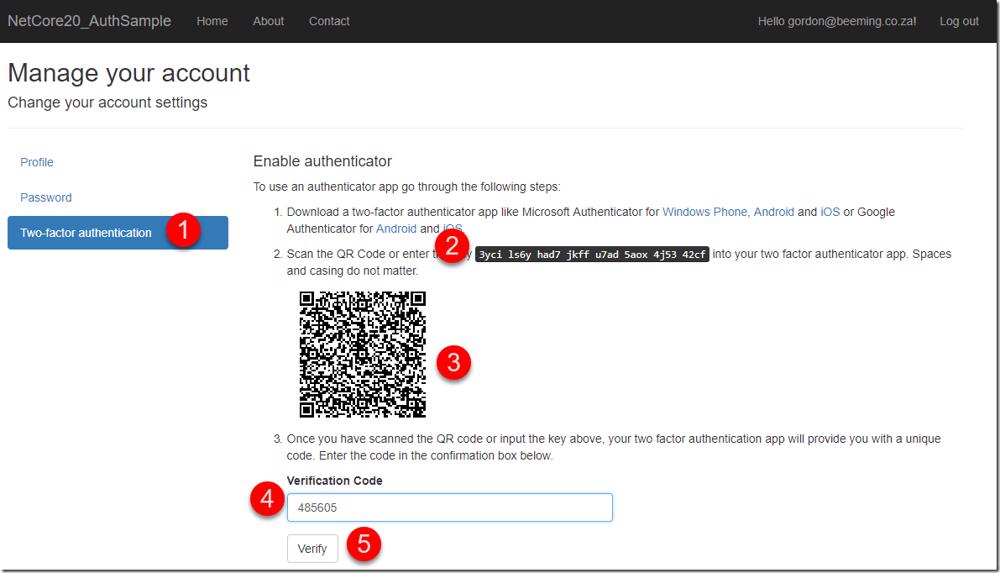
That's all that is required and now when you go configure 2 factor authentication you will see a QR Code that you can scan with a authenticator app like the Microsoft Authenticator app. You can test this by going to your profile and
Clicking on Two-factor authentication
You still have the code if your want/need to type it but
Now you can also scan the QR Code, scan it with your app and then
Enter the verification code you see in the app and
Click Verify
Enable Authenticator - QR Code and Verification
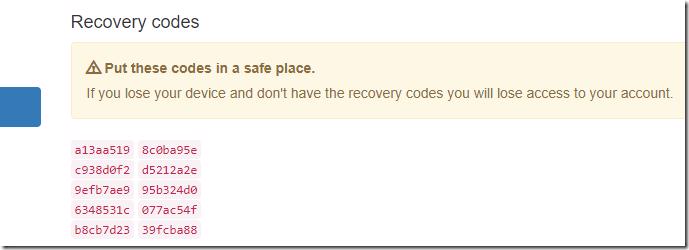
You'll now be presented with the recovery codes which you can use if you get locked out of your account because you can't access your 2FA device
Doing pretty much anything that you used to do is the same if not simpler than how it used to be with the full framework before. Adding social logins from here is also very easy but I'll save that for another post 😁
Gordon Beeming
Father • Husband • Triathlete • SSW Solution Architect