Adding TinaCMS Visual Editing to My Recipe Site

On this page7 sections ▾
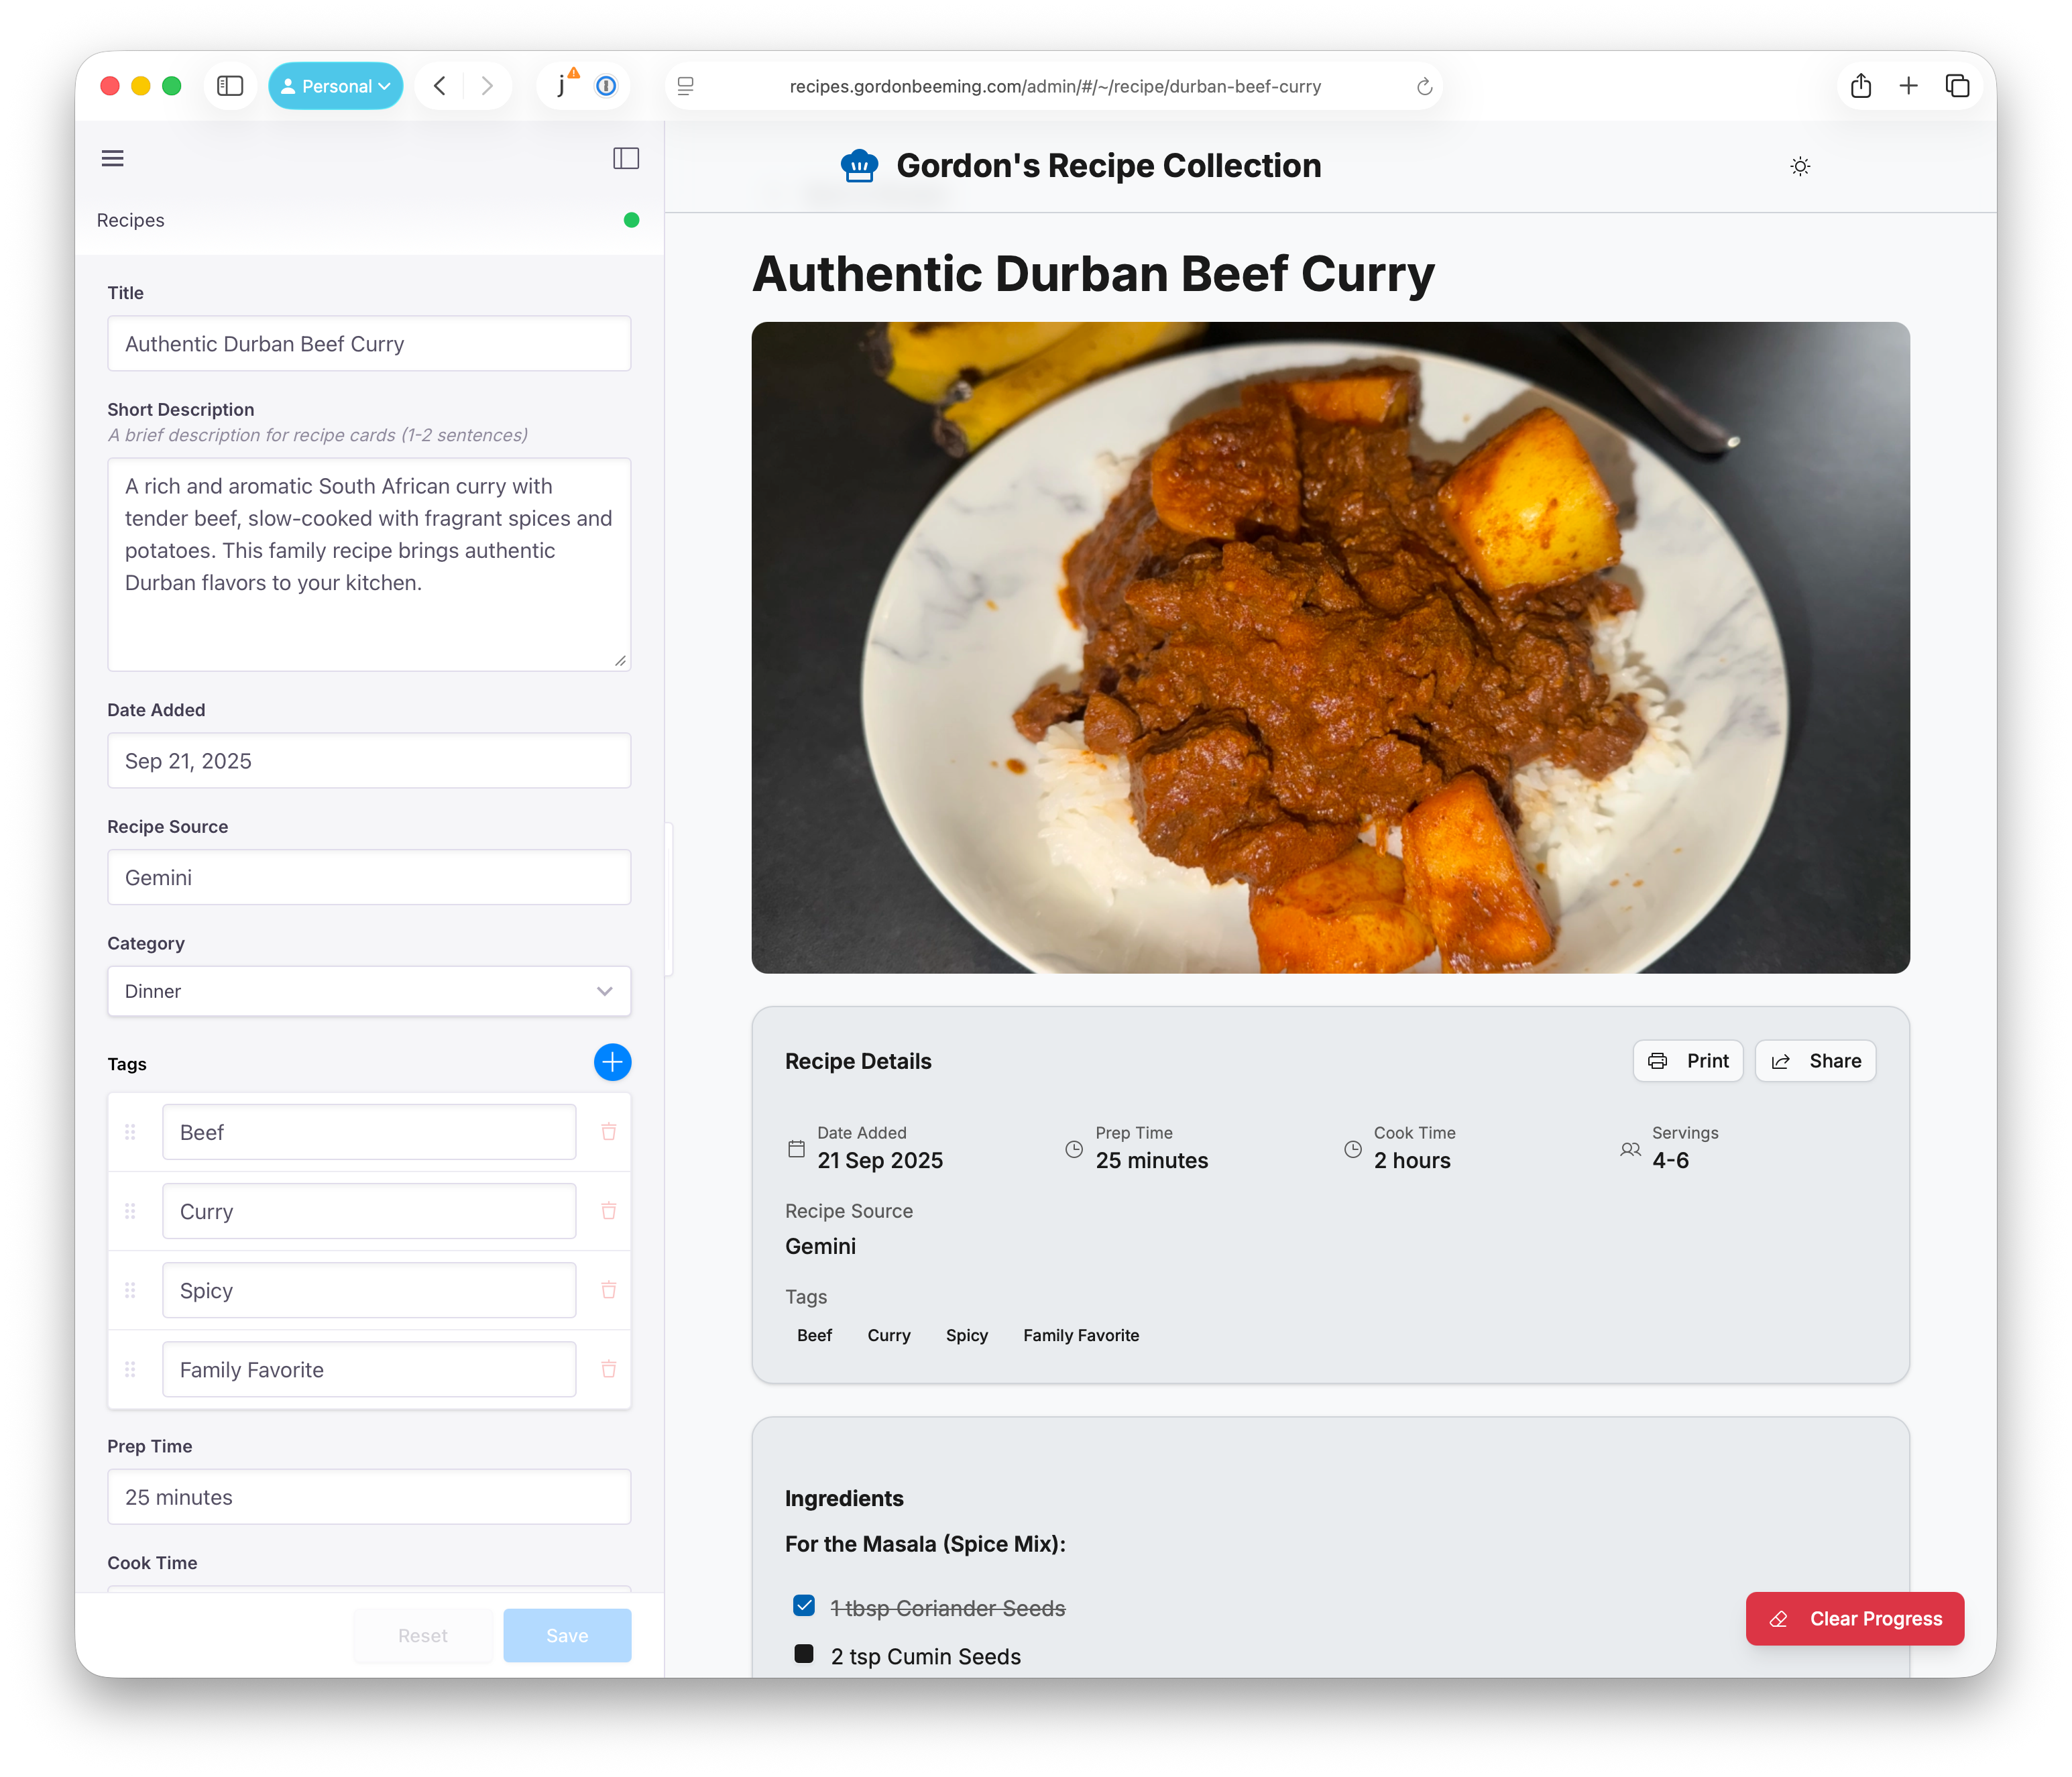
I added TinaCMS visual editing to my recipe site (recipes.gordonbeeming.com) so I could preview changes while editing. The integration needed useTina(), a collection route and TinaMarkdown. My custom recipe checkboxes also needed their own renderer configuration, distinct identifiers and a way to subscribe to state changes.
#Connecting the editor to the recipe page
I already had TinaCMS integrated into my recipe site. I could edit recipes in the /admin panel, save changes, and they'd show up on the site. But there was no visual preview, I had to switch between the editor and the live site to see how changes looked.
I wanted to see changes live as I typed. So I reached out to Jack Pettit from the TinaCMS team, and he pointed me to two key pieces:
- The
useTina()hook - Adding a
router()function to my Tina config
#Adding the route and useTina hook
The router config was straightforward, add this to your collection in tina/config.ts:
export default defineConfig({
  //...
  schema: {
    collections: [
      {
        //...
        ui: {
          //...
          router(args) {
            return `/recipe/${args.document._sys.filename}`;
          },
        },
        //...
      },
    ],
  },
});
This tells Tina where to navigate when you're editing a document. Simple enough.
Next, I needed to use the useTina() hook and switch from ReactMarkdown to TinaMarkdown for rendering content:
import { useTina } from 'tinacms/dist/react'
import { TinaMarkdown } from 'tinacms/dist/rich-text'

export function RecipeDetail({ data, query, variables, onBack }: RecipeDetailProps) {
  // Always use Tina for live editing
  const { data: tinaData } = useTina({ data, query, variables })

  const recipe = tinaData.recipe
  const content = recipe.body

  return (
    <div>
      {/* ... other content ... */}
      <TinaMarkdown content={content} />
    </div>
  )
}
This enabled live preview from /admin, but the custom checkboxes for tracking recipe steps were missing. Switching the Markdown renderer meant adapting those components too.
#When custom components meet TinaMarkdown
TinaMarkdown and ReactMarkdown have different custom-component APIs. The list-item renderer I'd configured for ReactMarkdown didn't transfer automatically.
I had custom components set up for ReactMarkdown:
const components = {
  li: ({ children, node }: any) => {
    // Custom checkbox logic for list items
    return <CheckboxListItem>{children}</CheckboxListItem>
  }
}

<ReactMarkdown components={components}>{content}</ReactMarkdown>
But TinaMarkdown needs its own configuration:
const tinaComponents = {
  ul: (props: any) => (
    <ul className="space-y-1 list-none pl-0">
      {props.children}
    </ul>
  ),
  li: (props: any) => {
    // Your custom logic here
    return <CheckboxListItem>{props.children}</CheckboxListItem>
  }
}

<TinaMarkdown content={content} components={tinaComponents} />
The checkboxes rendered again, but their click behaviour still needed attention.
#Giving each checkbox its own identifier
I was generating unique keys for each checkbox based on the text content:
const ListItem = (props: any) => {
  const itemText = String(props.children)  // ❌ This was the problem
  const itemKey = itemText.slice(0, 50)

  return <CheckboxListItem key={itemKey} itemKey={itemKey}>
    {props.children}
  </CheckboxListItem>
}
The console showed me this:
ListItem key: "durban-beef-curry-" text: ""
ListItem key: "durban-beef-curry-" text: ""
ListItem key: "durban-beef-curry-" text: ""
The log showed the same identifier for each checkbox.
The children passed by TinaMarkdown can be React elements rather than plain text:
{
  $$typeof: Symbol(react.transitional.element),
  type: function,
  props: {...},
  // ... more React internals
}
Converting a React element with String() doesn't extract its visible text; it commonly produces [object Object]. The empty text in this log came from a path the short excerpt doesn't fully show. Either way, using rendered children as a persistent identifier was unreliable, and the shared identifier meant the checkboxes addressed the same entry in my progress state.
#Using position-based identifiers
I changed the identifier to a recipe slug and a list-item counter.
The counter was enough to get this version working, but a position-based identifier has limits. Inserting or reordering steps can associate saved progress with a different step. A counter incremented during rendering also needs care when React renders a component more than once; the excerpt above isn't a general guarantee of stable keys. For content that changes order, store a persistent step ID in the content and use that for both rendering and progress state. React's list-key guidance explains why IDs should come from the data and stay stable between renders.
This was the counter-based implementation:
// Add a ref to track the counter
const listItemCountRef = useRef(0)

const tinaComponents = useMemo(() => {
  // Reset counter when components recreate
  listItemCountRef.current = 0

  const ListItem = (props: any) => {
    // Generate unique key using slug + index
    const itemKey = `${slug}-item-${listItemCountRef.current++}`

    return (
      <CheckboxListItem key={itemKey} itemKey={itemKey}>
        {props.children}
      </CheckboxListItem>
    )
  }

  return {
    ul: (props: any) => (
      <ul className="space-y-1 list-none pl-0">{props.children}</ul>
    ),
    li: ListItem,
  }
}, []) // Empty deps - components never change
This produces identifiers like durban-beef-curry-item-0, durban-beef-curry-item-1, etc.
#Subscribing to checkbox state through context
The checkboxes also needed to update visually when progress changed. I could see state changing in the logs, but the rendered checkboxes weren't updating.
In this setup, passing checkbox state through the renderer wasn't getting updates to the custom components.
I provided the state through React Context so each checkbox could subscribe directly:
// Create context for checkbox state
const CheckboxContext = createContext<{
  checkedItems: Record<string, boolean>
  onToggle: (key: string, checked: boolean) => void
} | null>(null)

// CheckboxListItem reads from context
const CheckboxListItem = ({ children, itemKey }: CheckboxListItemProps) => {
  const context = useContext(CheckboxContext)
  const { checkedItems, onToggle } = context
  const checked = checkedItems[itemKey] || false

  return (
    <li>
      <Checkbox
        checked={checked}
        onCheckedChange={(c) => onToggle(itemKey, c)}
      />
      <label className={checked ? 'line-through' : ''}>
        {children}
      </label>
    </li>
  )
}

// Wrap TinaMarkdown in the provider
<CheckboxContext.Provider value={{ checkedItems, onToggle: handleCheckboxChange }}>
  <TinaMarkdown content={content} components={tinaComponents} />
</CheckboxContext.Provider>
When the provider value changes, components reading that context receive the updated value. React's useContext reference covers this subscription behaviour, including updates through memoized parents.
#Checking the live editor
Check the page with the actual CMS editor running, including clicking checkboxes, editing a step and reopening the recipe. In my case, the custom list renderer and context subscription restored the interactive checkboxes alongside live preview.