Creating a CheckPoint VPN Connection on Windows 8.1

So we use CheckPoint VPN, but the most frustrating part is that when a new version on windows is released the CheckPoint VPN client is incompatible with it and makes your computer weird when you do try use it.
For a while now I (and others) have been waiting for a client for windows 8.1. Very recently I found out that this functionality is baked into Windows 8.1 already and we don't have to wait 🙂. Here's how to create the VPN connection
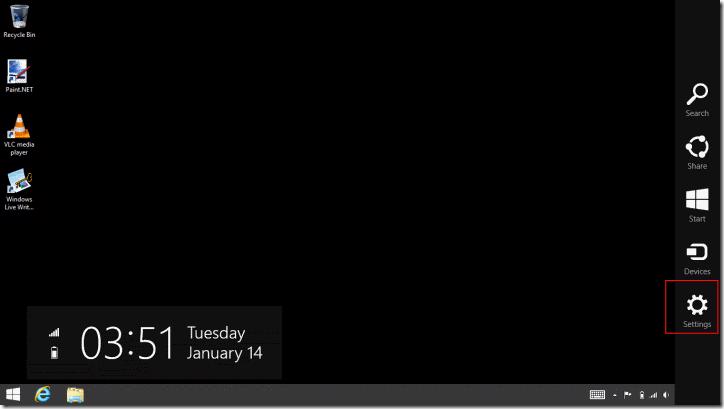
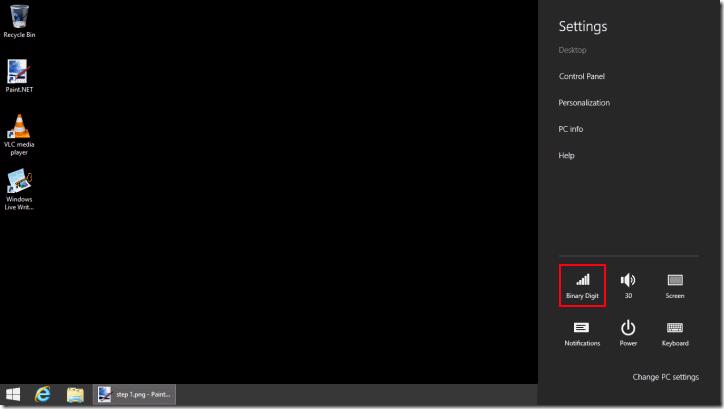
Open the Charms bar (slide from the right or Win + C) and click Settings
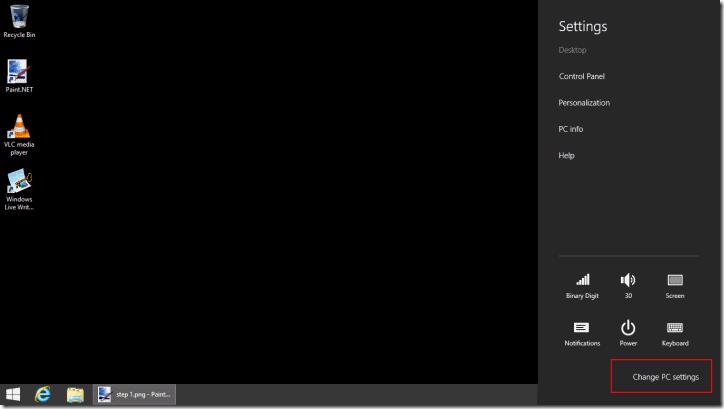
Select Change PC Settings
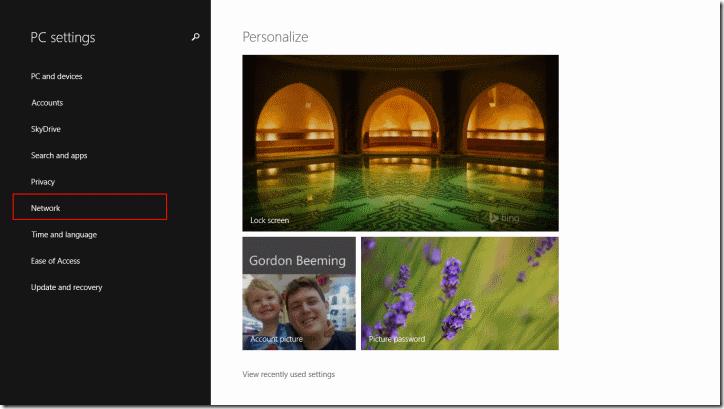
Click on Network
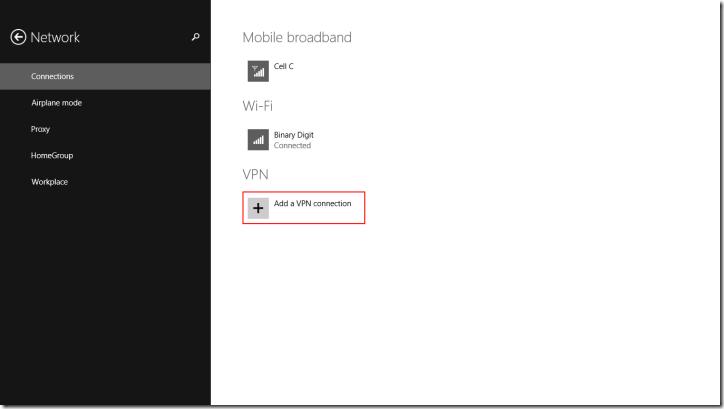
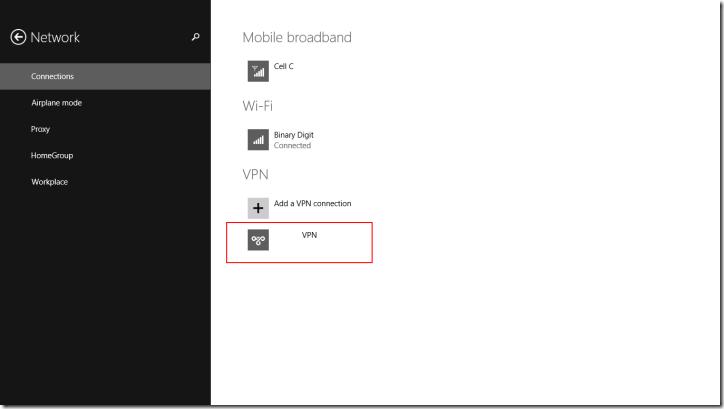
Under connections select Add a VPN connection
Choose Check Point VPN as the provider, enter a name for the connection and also enter the server name or address and click Save
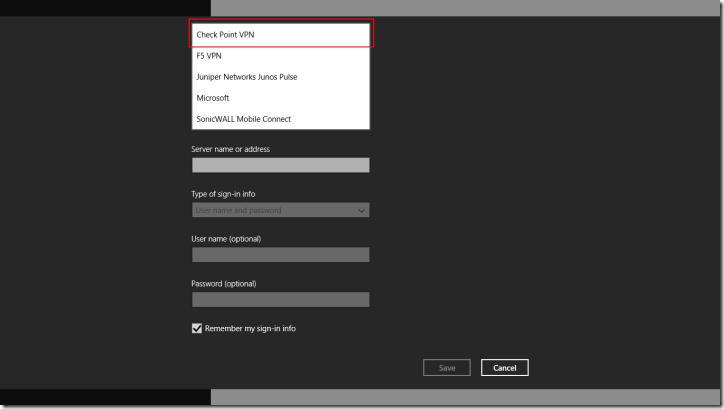
You should see your connection in the Connections page now
Head back to the charms bar and click Networks
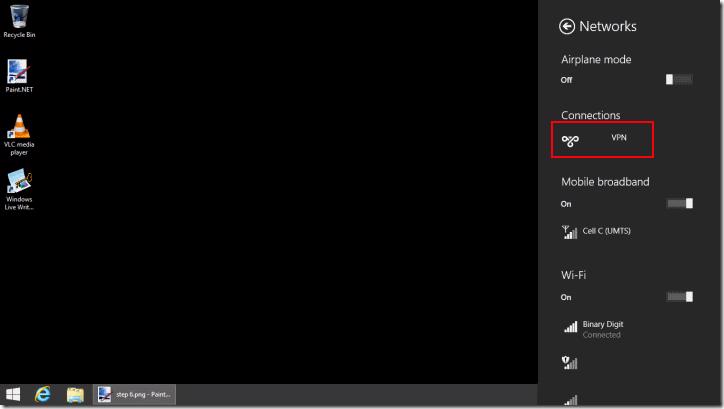
Under Connections you will see your VPN connection, Click on it
Click on Connect
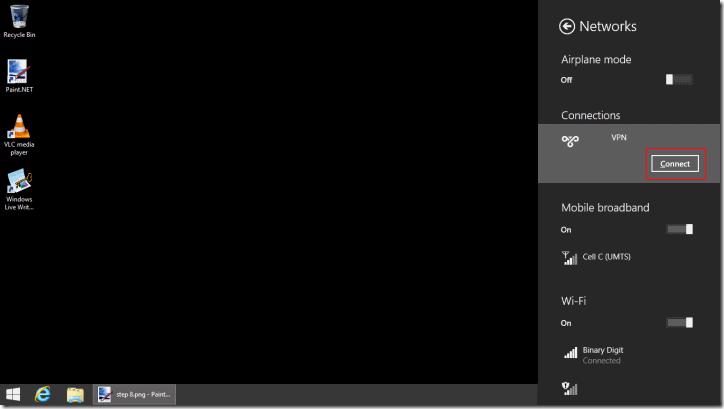
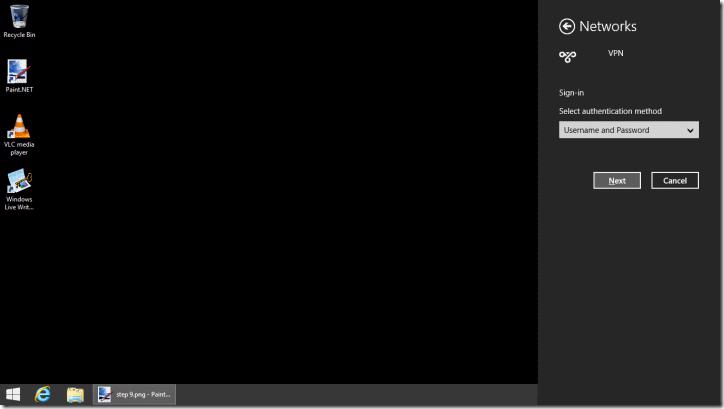
Select the authentication method (I'll use Username and Password), Click Next
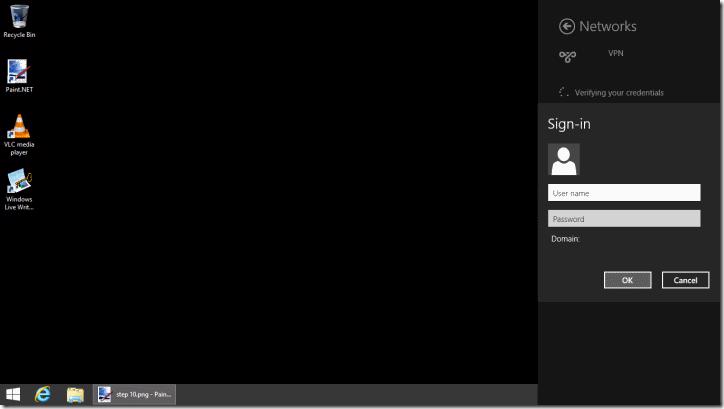
Enter the Username and Password and click OK
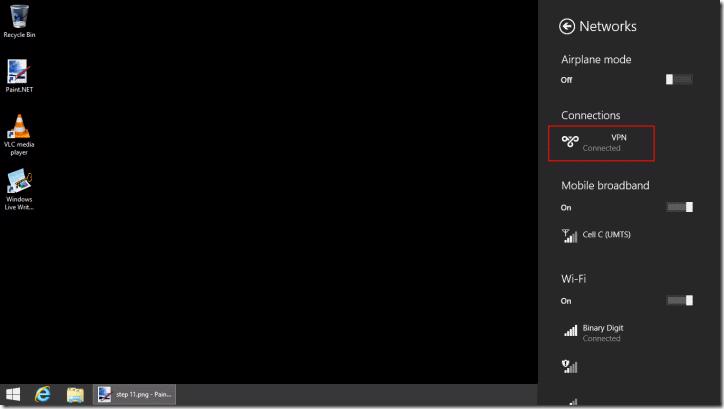
You will now be connected
It's that simple, no more waiting around for VPN providers to update their clients 🙂