Implementing a dynamic robots.txt

On this page1 section ▾
Firstly you might want to know why would you want to implement a dynamic robots.txt? Isn't it better to just put a static file in the web app? Yes it is but when you running your application on certain platforms like web apps in Azure when you using deployment slots. I found this handy link which explains deployment slots quite nicely 🙂, but basically what happens is when you switch 2 slots Azure will do a virtual IP switch so traffic from your slots will now be switched (not the files from each slot).
#Implementation
To implement a dynamic robots.txt is very simple, we just need a couple components. We using MVC in this example but the the physical code is the same for web forms except for how we route to our handle code and similar for other technologies.
- Create a controller for handling our robots.txt
- Setup a route in mvc for robots.txt
- Tell asp.net that we want to handle all requests
- A way to know if we want to 'host' a robots.txt
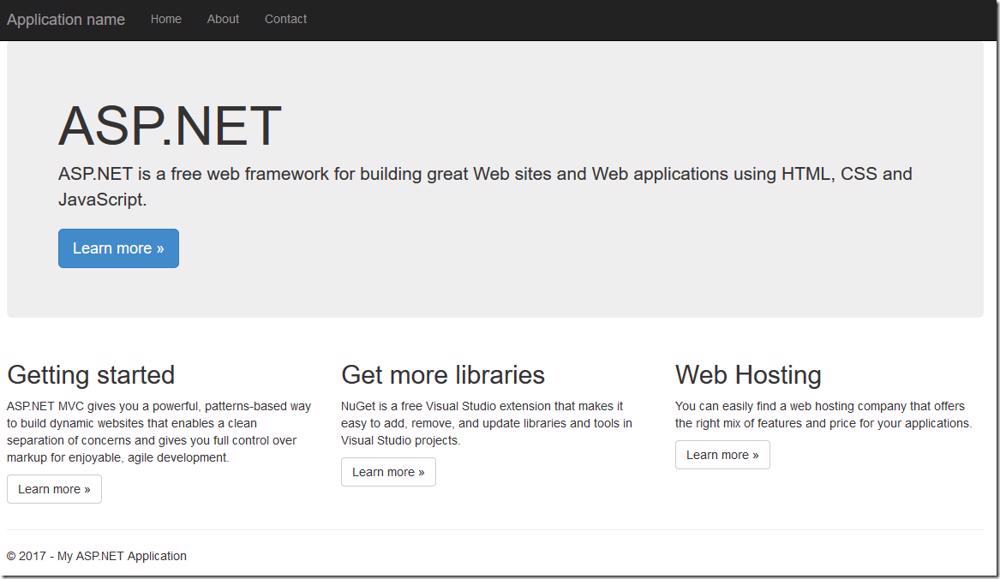
Our sample code starts off with a brand new MVC web application with no other alterations.
#Creating a controller.
We are going to create a standard MVC controller called RobotsTxtController

Replace the contents of the Index action like with the below
public ActionResult Index()
{
    var contentBuilder = new System.Text.StringBuilder();
    contentBuilder.AppendLine("User-agent: *");
    var useStandardRobotsTxt = true;
    if (useStandardRobotsTxt)
    {
        contentBuilder.AppendLine("Disallow: /admin");
        contentBuilder.AppendLine("Disallow: /Admin");
        contentBuilder.AppendLine($"Sitemap: http://{HttpContext.Request.Url.DnsSafeHost}:{HttpContext.Request.Url.Port}/sitemap.xml");
    }
    else
    {
        contentBuilder.AppendLine("Disallow: /");
    }
    return File(System.Text.Encoding.UTF8.GetBytes(contentBuilder.ToString()), "text/plain");
}
This will now use a bool field to determine if we are needing to show our real robots.txt or a deny all robots.txt which you'd want to show on your testing sites generally. If you don't have any custom contents for your robots.txt (which you probably would or should) you can return a 404 for robots.txt so it's like that file doesn't exist on the server like below 🙂
public ActionResult Index()
{
    var contentBuilder = new System.Text.StringBuilder();
    contentBuilder.AppendLine("User-agent: *");
    var useStandardRobotsTxt = true;
    if (useStandardRobotsTxt)
    {
        return HttpNotFound();
    }
    else
    {
        contentBuilder.AppendLine("Disallow: /");
    }
    return File(System.Text.Encoding.UTF8.GetBytes(contentBuilder.ToString()), "text/plain");
}
Now that our code is in we need a way for it to be executed
#Setting up a route in MVC
We'll need to navigate over to the RouteConfig in the App\_Start folder. Add the following code before any of your other route maps
This will now route requests to /robots.txt to our new controller. However if we browse to our robots.txt file you'll notice that it returns a 404 even thought we'd expect it to show the robots.txt content
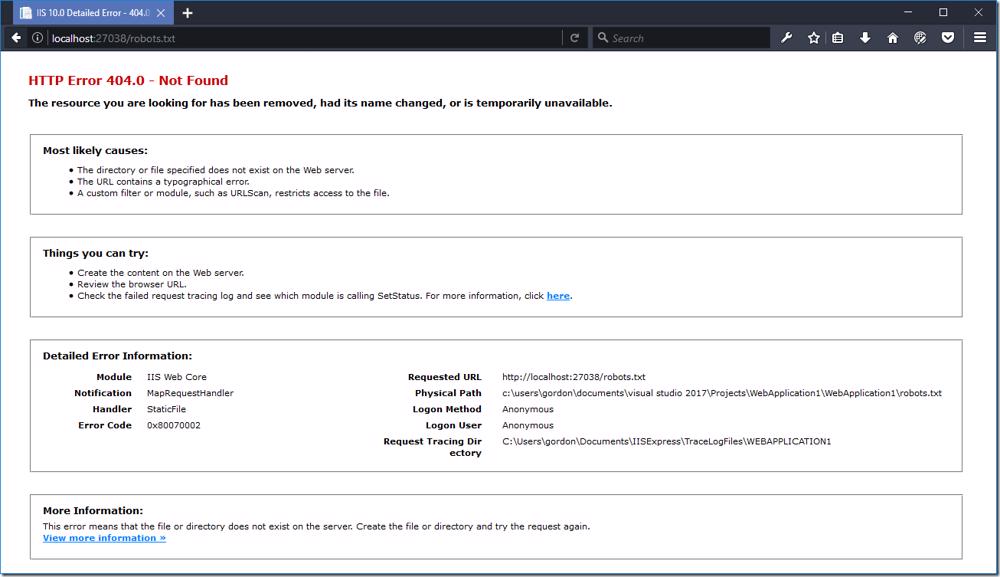
The reason for this is that we aren't telling the asp.net pipeline that we want to handle all requests including those that are generally extensions of static files like .txt.
#Handle all requests
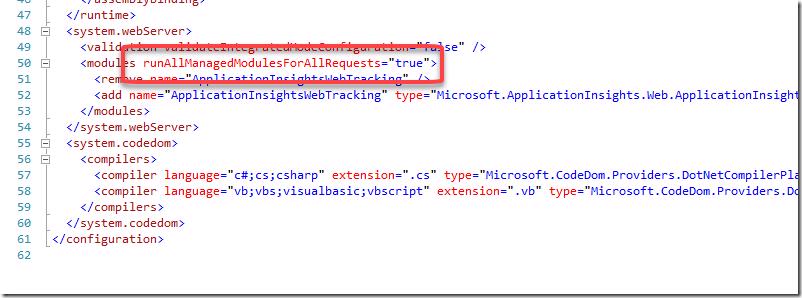
Luckily for us handling all requests is as simple as adding a new attribute in the web.config. Navigate to the system.webServer/modules node and add the attribute runAllManagedModulesForAllRequests with a value of true.
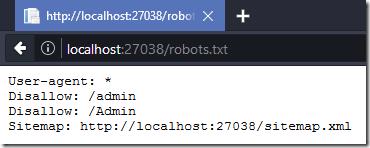
Now if we navigate to our robots.txt file we'll see the expected content
switching the bool field to say we don't want to show our production robots.txt
var useStandardRobotsTxt = false;and check the robots.txt again after compiling
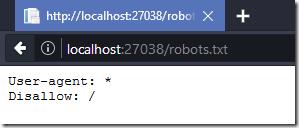
Obviously changing the bool field between environments is not an option as it would require a recompile of our code.
#Adding config to determine which robots.txt to show
The easiest way to do this is adding a new appSetting so that's what we'll do 🙂. Open the web.config and add a new app setting like below
<add key="config:UseStandardRobotsTxt" value="1"/>We'll also need to reference the setting in our controller so change the logic for the useStandardRobotsTxt to the below
var useStandardRobotsTxt = ConfigurationManager.AppSettings["config:UseStandardRobotsTxt"] == "1";This will now use that setting to determine which robots.txt to show.
#The new/old problem
Now although we have a way in our code to show which robots.txt to show we still switching the deployment slots which is switching the virtual IP's which means our web.config value will be set wrong in the wrong environment.
#The new/old problems solution
Lucky for us Azure deployment slots lets us set slot specific settings which we'll make use of. Start off by setting the appSetting value for config:UseStandardRobotsTxt to 0. This will ensure that we show the deny robots.txt by default. Navigate to your production deployment slot in Azure and open the Application settings blade.
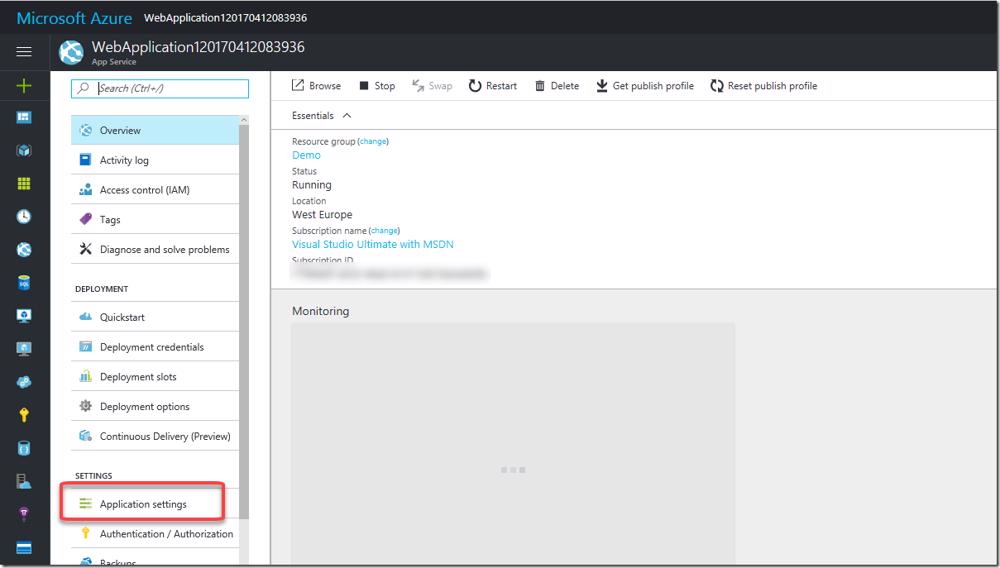
Scroll down to the App settings section and add a new app setting value matching what you have in your web.config's app settings, set the value to 1 and tick the Slot setting checkbox and click save.
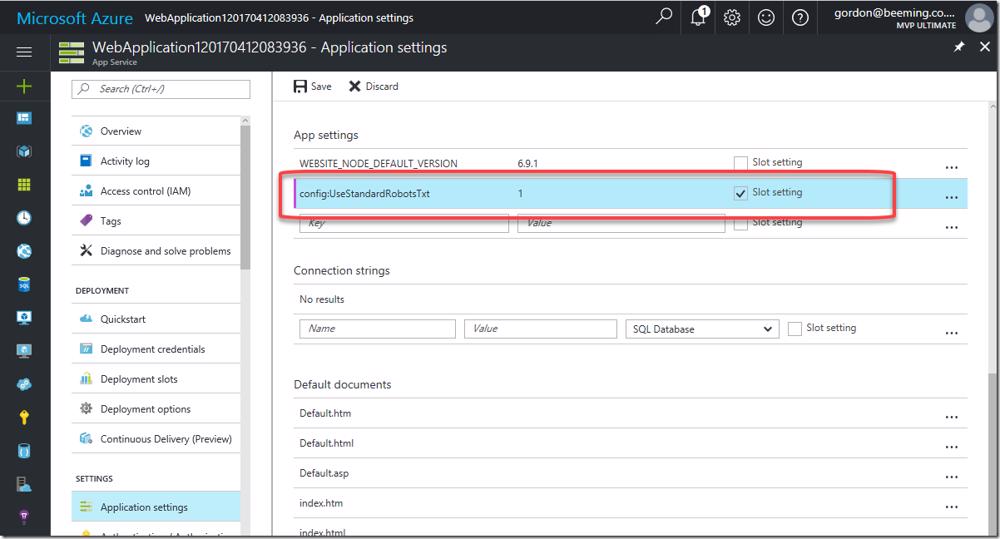
Your application will now show the deny robots.txt for all slots except the ones where this value is added and set to 1 😁.