Setting up .net core continuous integration build with VSTS/TFS

On this page3 sections ▾
You might be wondering after recently posting Setting up a standard continuous integration build with VSTS/TFS why I'd need to post specifically on .net core. After all it's still a Visual Studio solution so things should just work, the keyword here is should 🙂. Things didn't just work when I tried to get this working so decided to share my experience here (as well as document it for myself later 😜).
#Sample project
So we going to need a sample project for this, I'm going to create a standard .net core web project
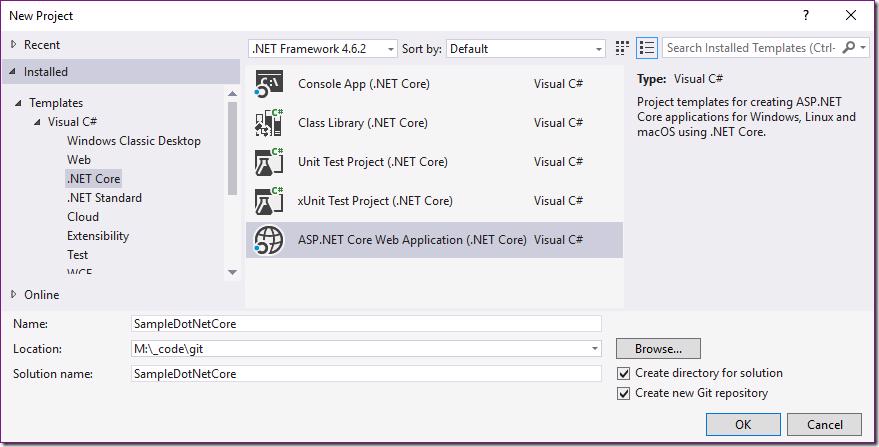
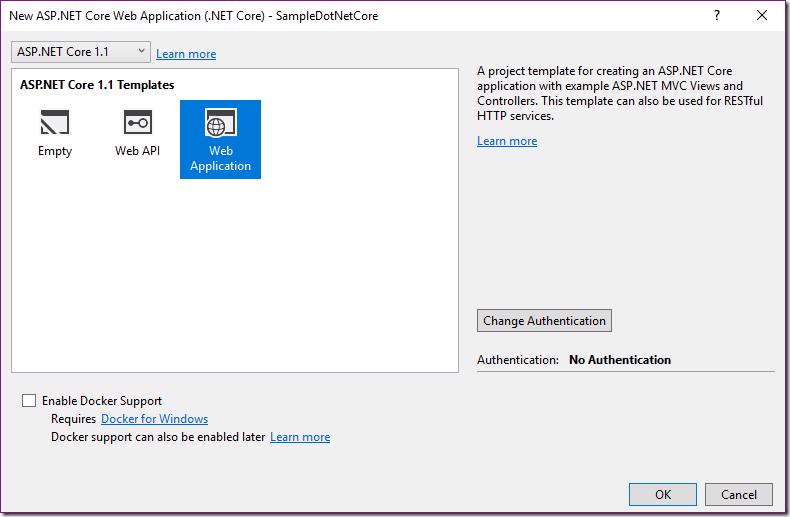
using asp.net core 1.1 as a Web Application
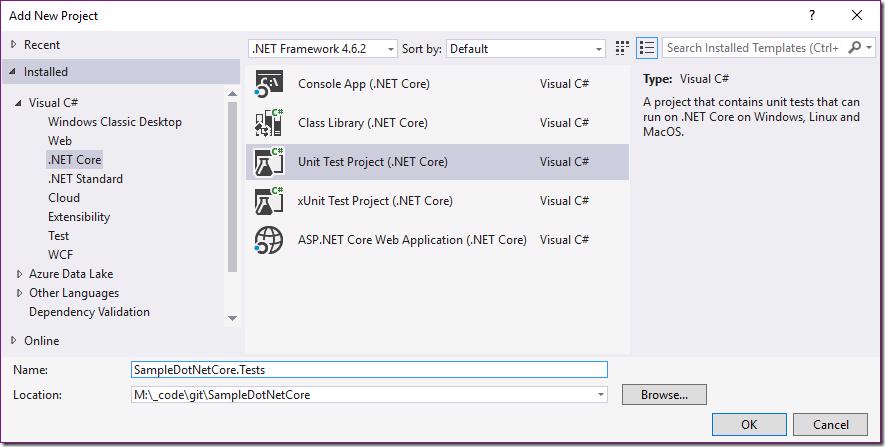
We also going to add another project using the Unit Test Project (.NET Core) template
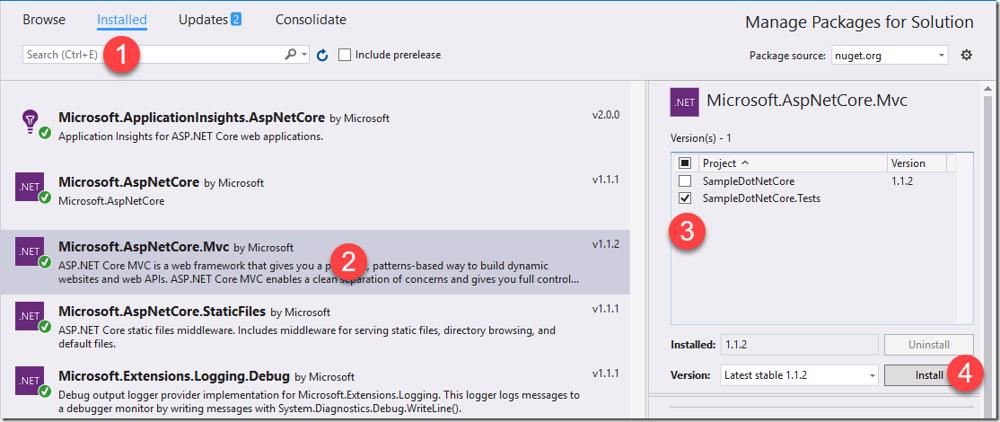
We now need to add the MVC nuget reference to this test project. Open manage Nuget reference for solution
- In the Installed tab
- Click on Microsoft.AspNetCore.Mvc
- Check the test project
- Click Install
Next we'll
- Add a reference to our web project
- Rename the test to "HomeControllerTests.cs"
- Rename the test class to "HomeControllerTests"
- Add a About Test Method which you can find in my GitHub Gists
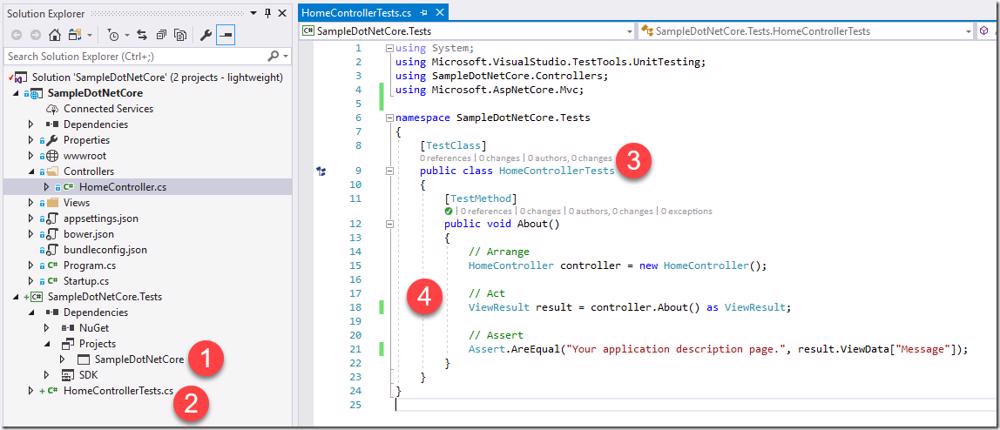
That should be all we need to demonstrate CI being harder for .net core 🙂. Check this code into TFS and we all set to get started
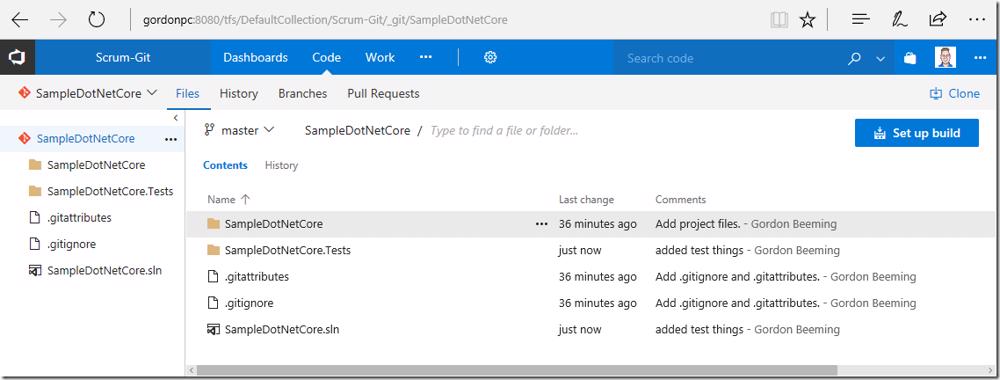
Let's start off by creating a standard build how explained in the last post I did Setting up a standard continuous integration build with VSTS/TFS, I only did the first section with non of the extra fluff 🙂.
#Changes to build for .net core
The first thing you will notice if you just try run the build it will break
#Restoring .net core packages
So our first set of errors is that the build can't find a bunch of references even though the restore step ran through.
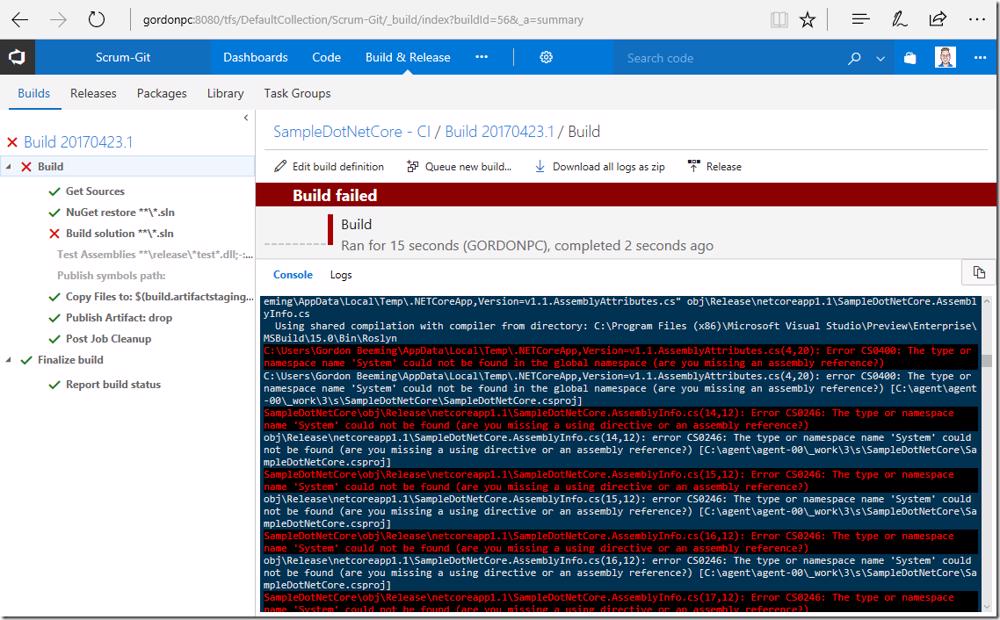
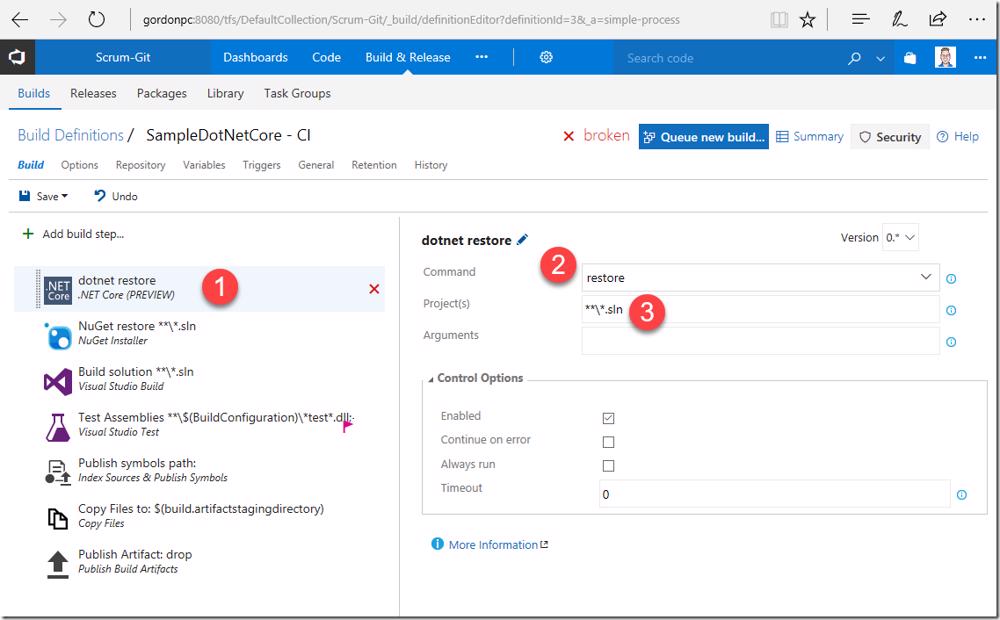
This is because we need to do our restore a different way using the .net core restore. Let's fix this by adding the .NET Core (PREVIEW) task to our build
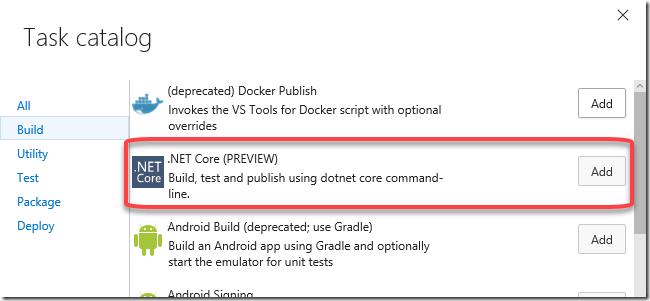
Next we need to
- Place this task first in the list of tasks
- Change the Command to restore
- Set the Project(s) to "\\\\*.sln"
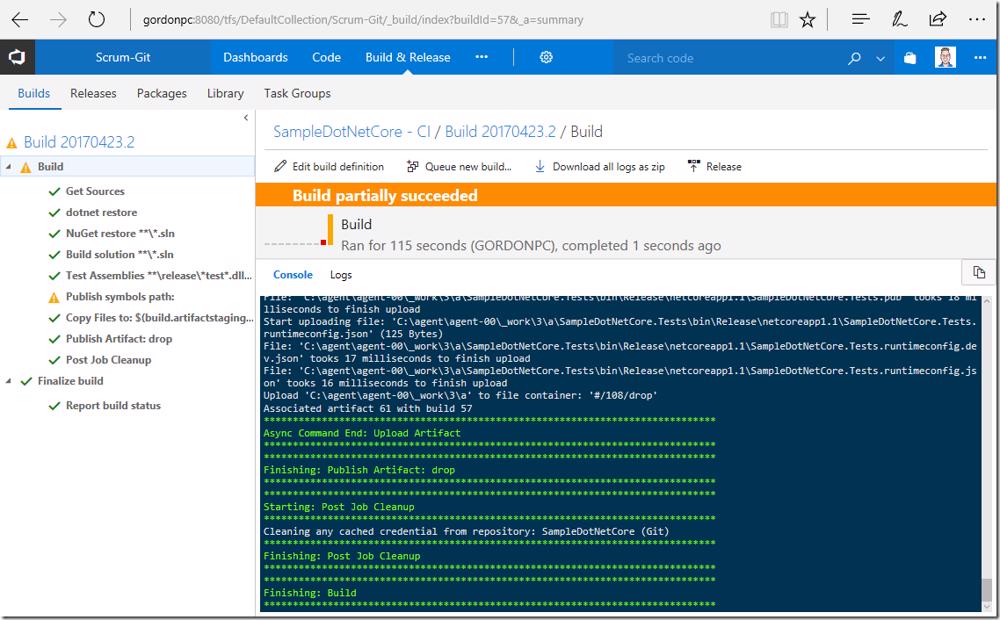
Click Save. Run your build. This time our build runs through but is partially succeeded.
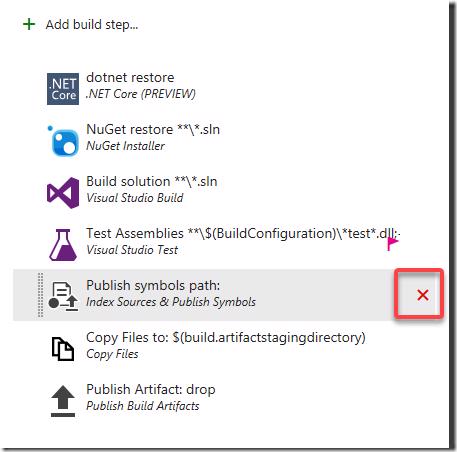
We going to remove the Publish symbols path step from our build because we aren't going to need it
Click Save after removing this and run your build so we can confirm everything is green before continuing on.
#Running .net core tests
If you looked at your build after it ran you would have noticed that there is no test results
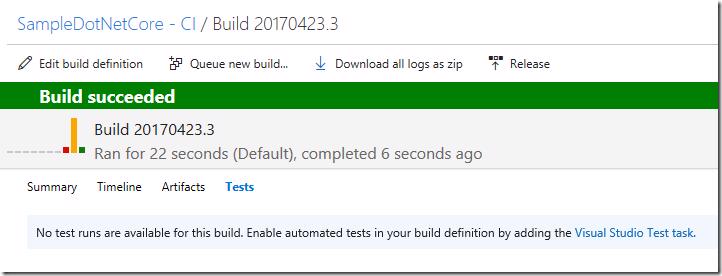
We know that we have a test and that we are running tests in the build so what's going on here?
Well you probably guessed it but we need to add the .NET Core (PREVIEW) step again this time
- Place the step after the Build solution step
- Change the Command to test
- Set the Project(s) to "\\\\*.Tests.csproj"
- Set the Arguments to "--no-build --logger:trx --configuration $(BuildConfiguration)"
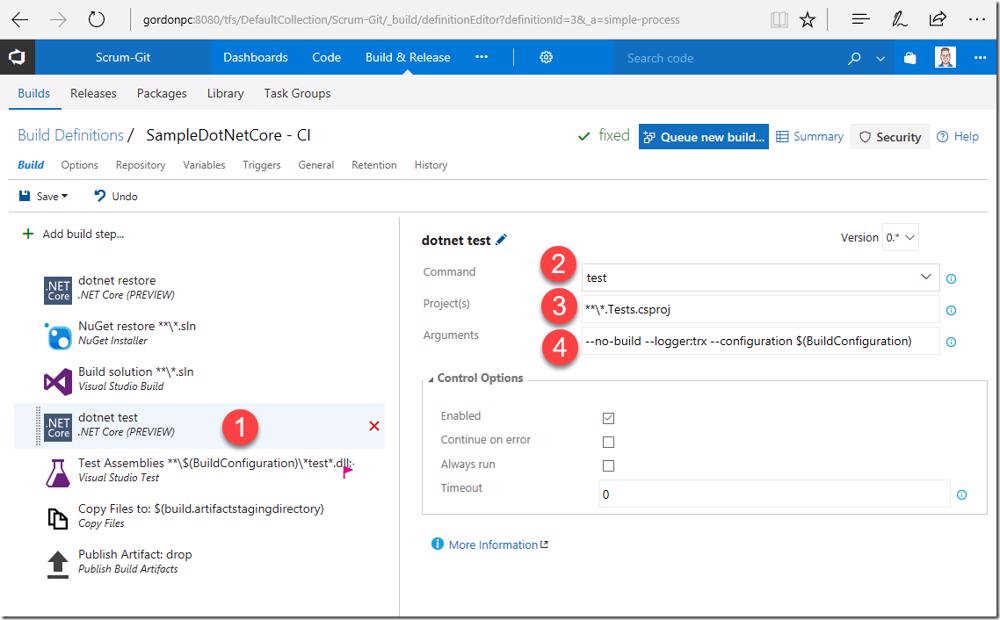
What we are doing now is using .net core's test capabilities, telling the running we want to log the results using the trx format and that we want to run the BuildConfiguration that the build is running under.
Click Save. Run the build. You will notice that there is still no test results showing up and this is because we need to tell the build system to publish these results. Add the Publish Test Results task
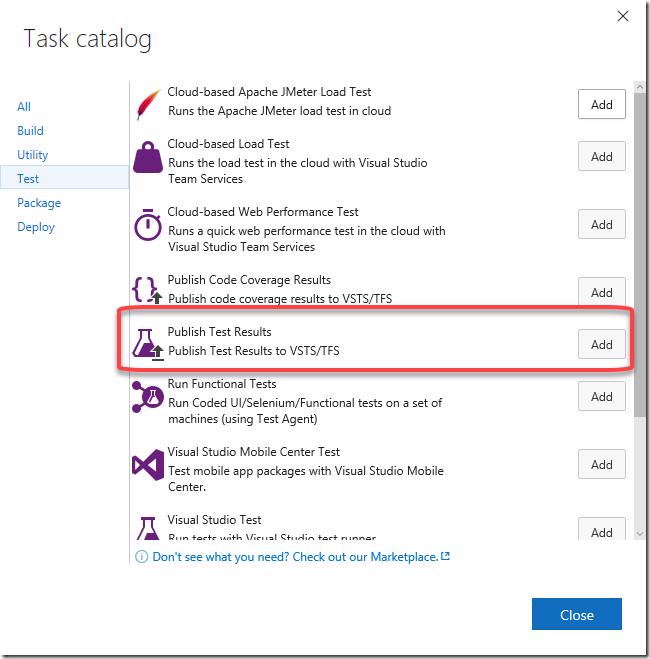
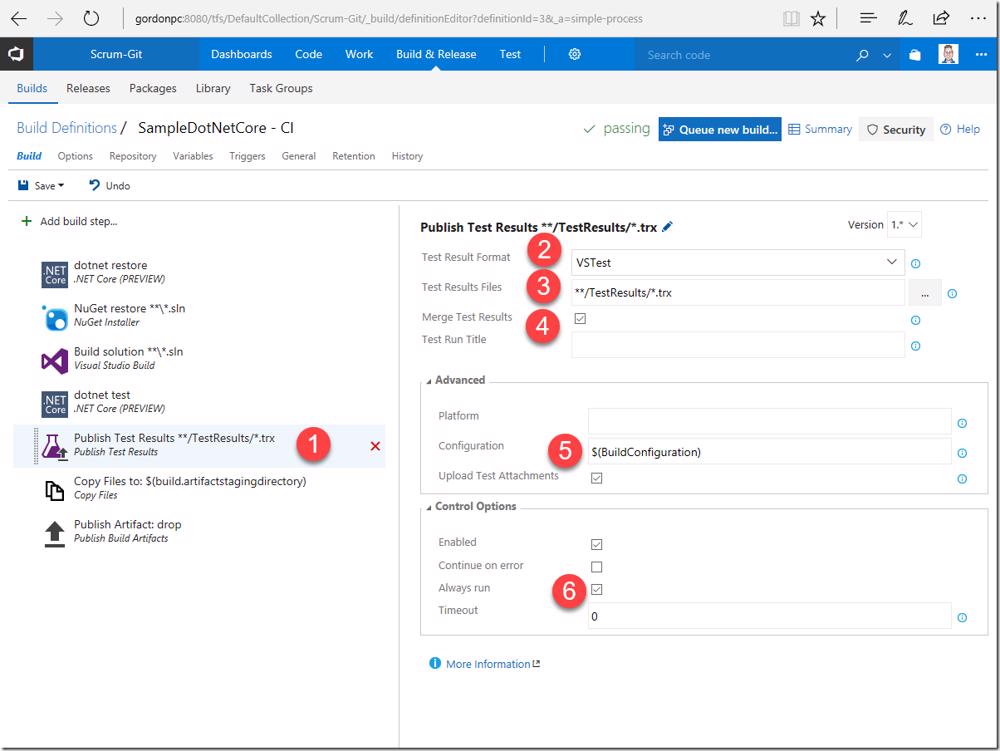
Next we'll
- Make sure we place that task after the dotnet test task
- Set the Test Result Format to VSTest
- Set the Test Results Files to "\\/TestResults/\*.trx"
- Check the Merge Test Results checkbox
- Open the Advanced section and set the Configuration to "$(BuildConfiguration)"
- Check the Always run (we want to publish results if test fail 😜, thank you Mikael Krief)
Click Save. Run the build. This time when the build has run if you go to the Summary you will notice 2 weird things
- We have 2 tests found (but only building 1 configuration)
- The build says there is no tests found
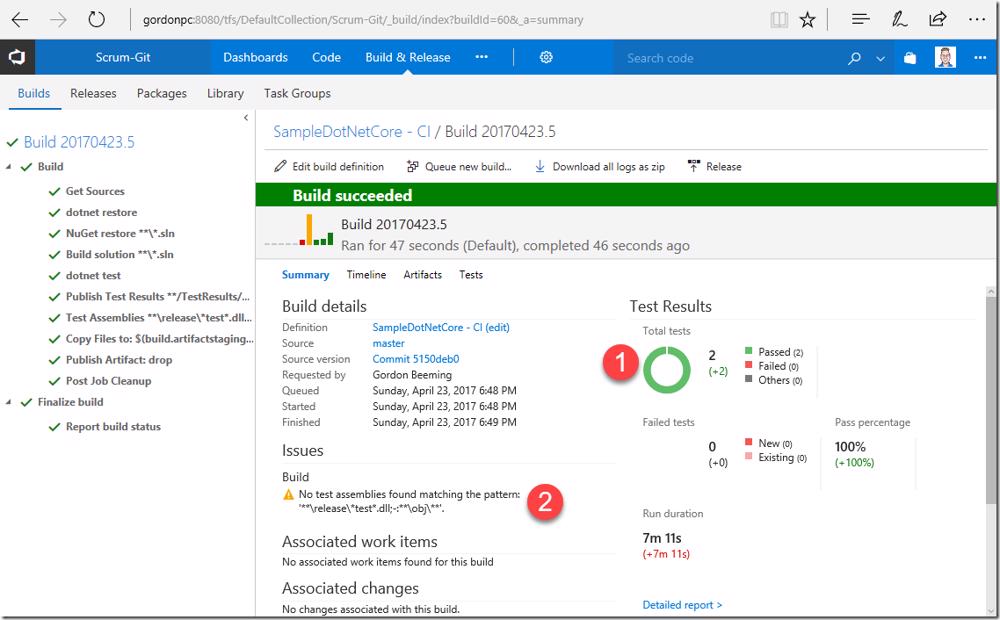
The 2nd issue is easy to fix, if you don't expect to have regular .net tests in the solution remove the standard test step to get rid of this warning

The 1st issue is because we are running the tests but not cleaning up the test results after the builds test results after they have generated or before we generate them in the build. The easiest way to fix this is to Clean all build directories before starting your build as I mentioned in the standard CI process blog mentioned multiple times in this post
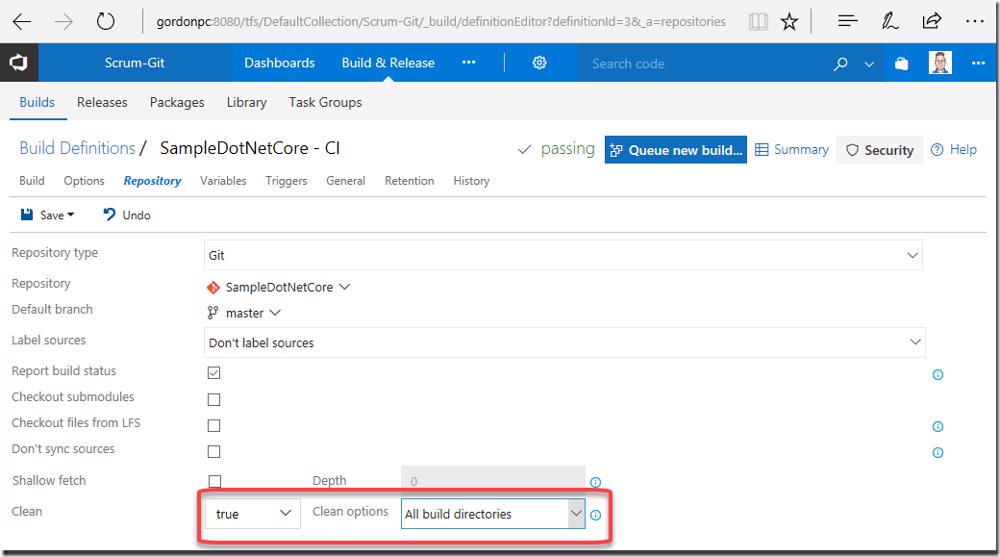
If you don't want to do this you can look at adding in a delete task before your run tests step to remove all trx files.
If we make either change, save and run the build. We'll notice that we have 1 test result. Note you may not have seen this experience if your build was running on a different agent each time but when it did run on the same agent again you would have seen this behavior
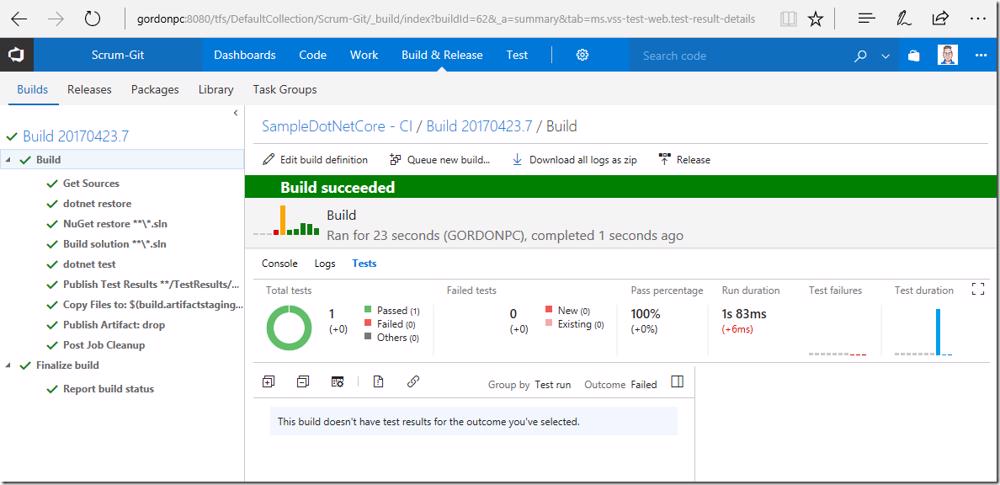
Now our CI process is behaving like normal 🙂
#Conclusion
Yes there is extra steps you need to do for .net core but in the end the process is still considered easy, especially if you have developed with .net core and know the dotnet commands.