Publish aspnet core sites to Azure easily using GitHub actions

On this page5 sections ▾
Have a site sitting in GitHub that you currently maybe manually deploy to Azure or use some other tool? Why not use GitHub Actions to quickly and easily publish to Azure. I was pushing a small site (Guid.Empty) to Azure through GitHub and decided to document the couple steps for future me 😋... oh and for you of course 😅
#What's not covered in this post?
The following small bits are not covered in this post
- Creating a new repo in GitHub
- Creating a new dotnet core project
- Pushing code to GitHub
- Creating a new Azure Web App
So if you already have an aspnet core web project in GitHub you can follow on with this post 😁
#Downloading a publish profile from Azure Web Apps
Downloading a publish profile is really easy, navigate to a Azure Web App. Once open you should see a Get publish profile button, click this and it will download a publish profile file.
The publish profile file contains secrets that can be used to publish to this side, make sure you keep the contents of the file save and if you suspect the information might be leaked you can always come back to the portal and click the Reset publish profile button next to download to generate new publish profile credentials and invalidate the old profile.
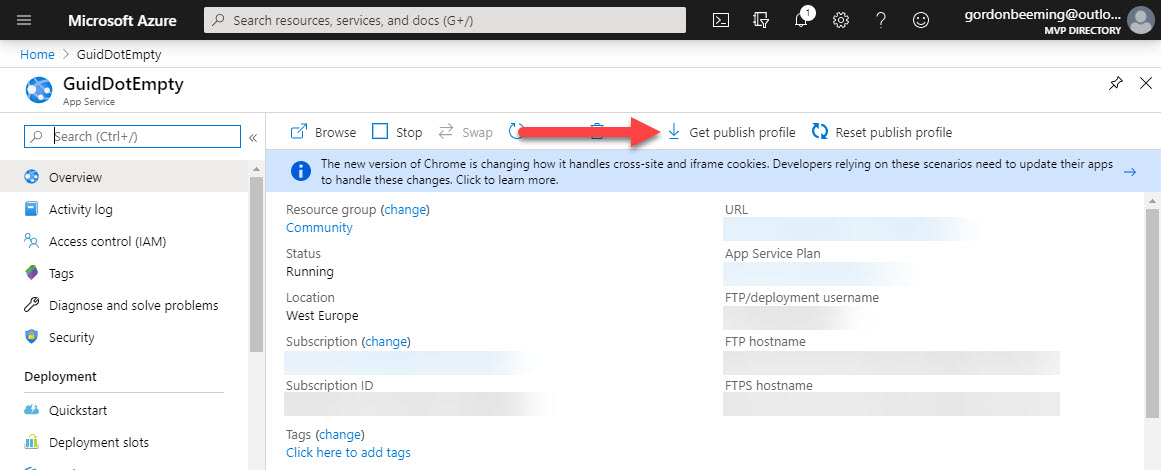
We are going to use the contents of that Publish.Settings file in the next section
#Creating a secret in GitHub
With a lot of projects being open source in GitHub and all actions being in source code you'd have to wondering how do you manage secrets?
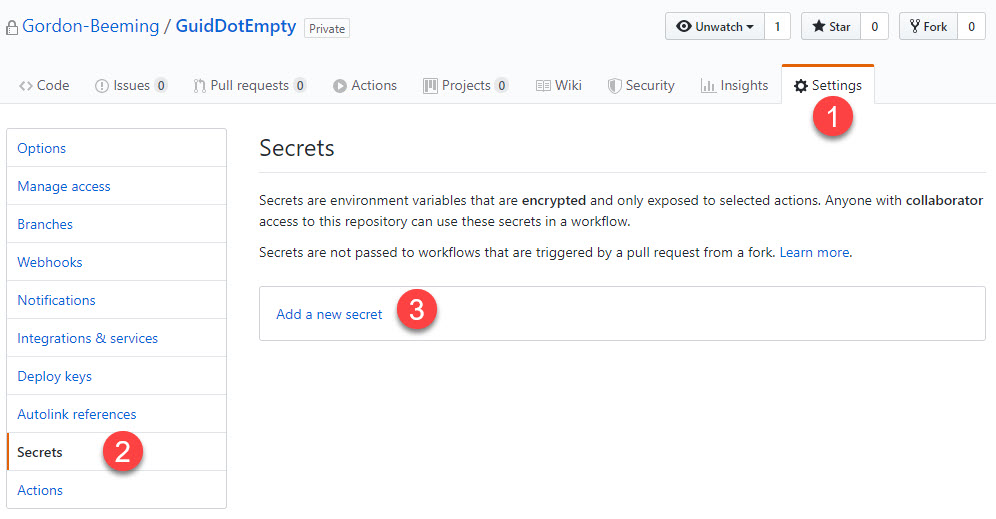
Well conveniently GitHub supports Secrets 😃, navigate to the Settings tab, click on Secrets and then Click on Add a new secret.
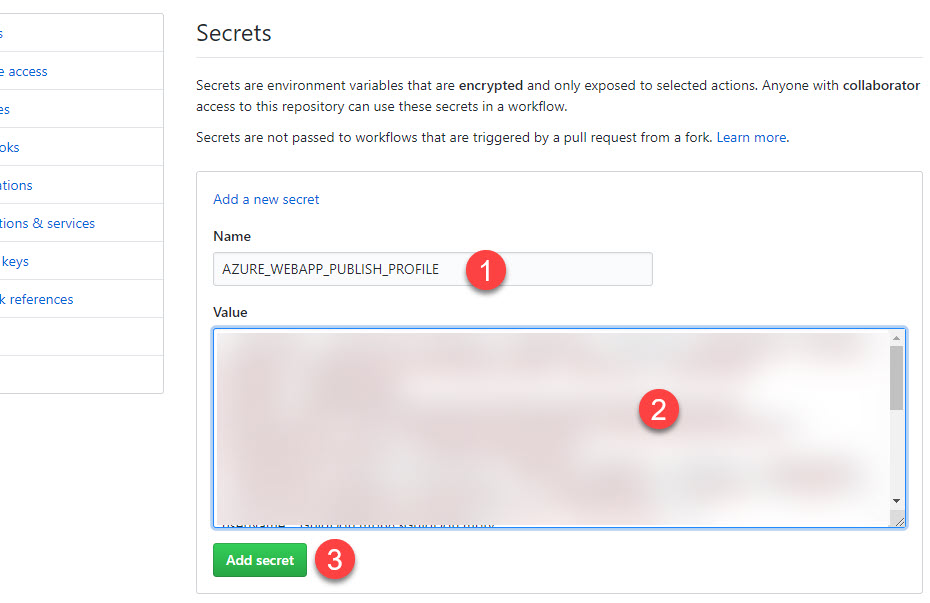
Name the secret AZURE\_WEBAPP\_PUBLISH\_PROFILE, paste in the contents of the publish profile we downloaded earlier from Azure and then Click on Add secret.
You'll see that your secret has been added and you only have the option to Remove the secret or Add new secrets. If you ever want to replace the secret you can just remove it and add it again using the same name.
#Creating a new workflow in GitHub
From your repo click on the Actions tab, you'll now notice a long list of starter templates that you can use to get started but we are going to just click on Set up a workflow yourself.
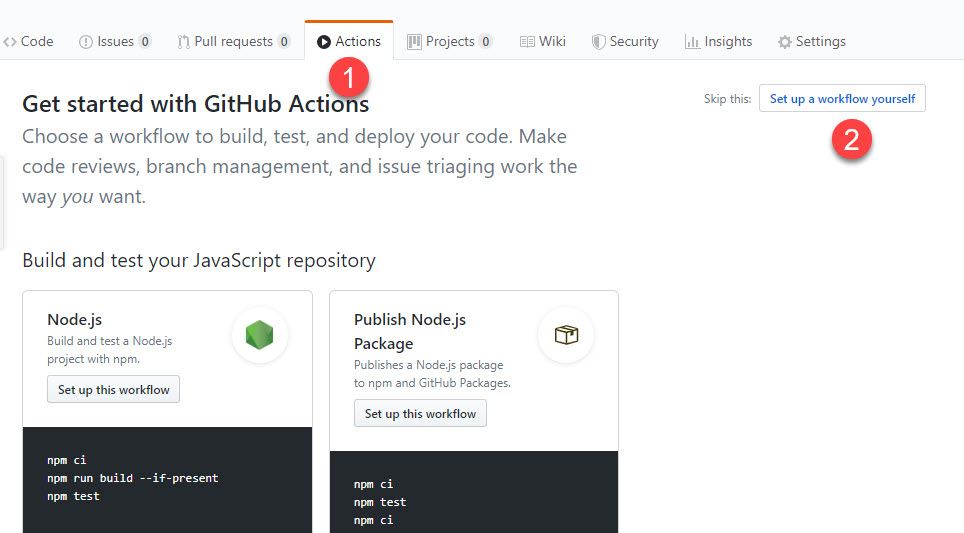
You'll now be taken to the Actions workflow editing screen.
Firstly you should name this workflow, I called mine publish-site-changes.yml. You will see on the right hand side the marketplace that contains tasks that you can use to build your workflow with, we are not going to cover using those tasks in this post and will skip to adding the workflow code into the Edit file section as below
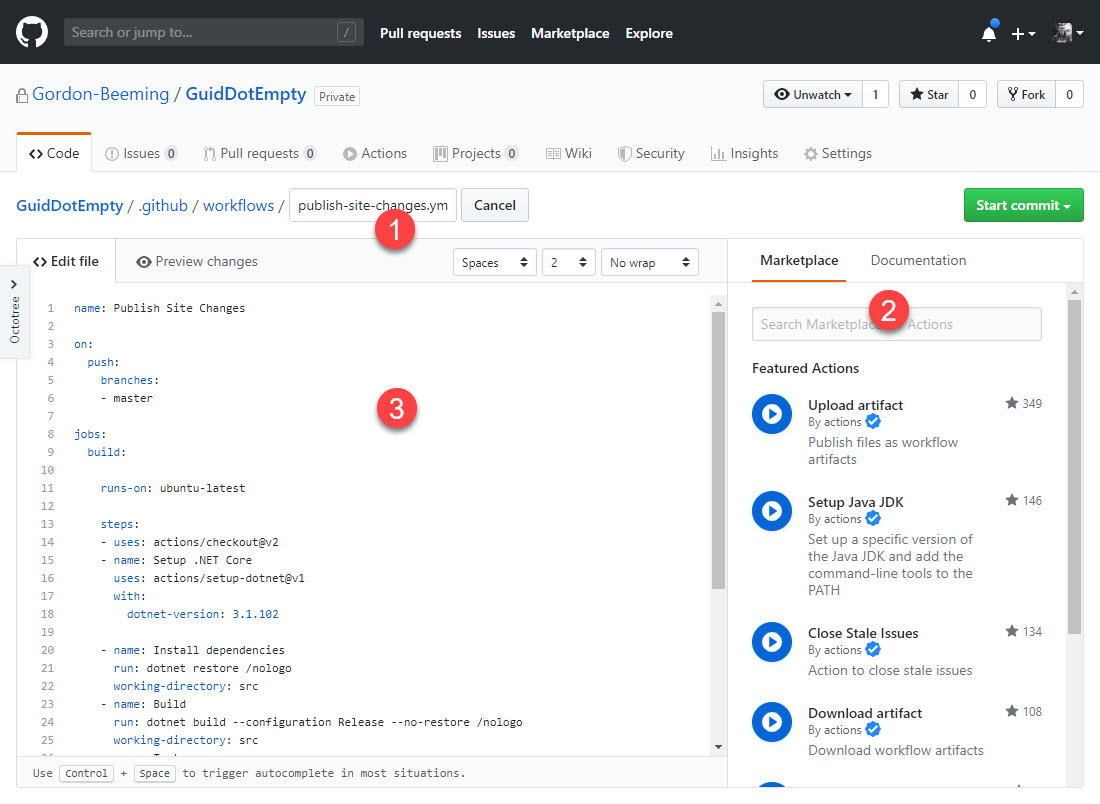
See below the code snippet to use, the only part you might need to change is making sure the netcore version matches what you used in your project
name: Publish Site Changes

on:
  push:
    branches:
    - master

jobs:
  build:

    runs-on: ubuntu-latest

    steps:
    - uses: actions/checkout@v2
    - name: Setup .NET Core
      uses: actions/setup-dotnet@v1
      with:
        dotnet-version: 3.1.102 # make sure the dotnet version matches your project

    - name: Install dependencies
      run: dotnet restore /nologo
      working-directory: src
    - name: Build
      run: dotnet build --configuration Release --no-restore /nologo
      working-directory: src
    - name: Test
      run: dotnet test --no-restore --no-build --verbosity normal /nologo
      working-directory: src
    - name: Publish
      run: dotnet publish --no-restore --output "../package" --verbosity normal /nologo
      working-directory: src

    - name: 'Deploy to Azure WebApp'
      uses: azure/webapps-deploy@v2
      with:
        app-name: GuidDotEmpty
        publish-profile: ${{ secrets.AZURE_WEBAPP_PUBLISH_PROFILE }}
        package: package
The workflow above will automatically trigger on any changes to the master branch. You should also notice near the end we use the secret that we added earlier AZURE_WEBAPP_PUBLISH_PROFILE in the task named Deploy to Azure WebApp.
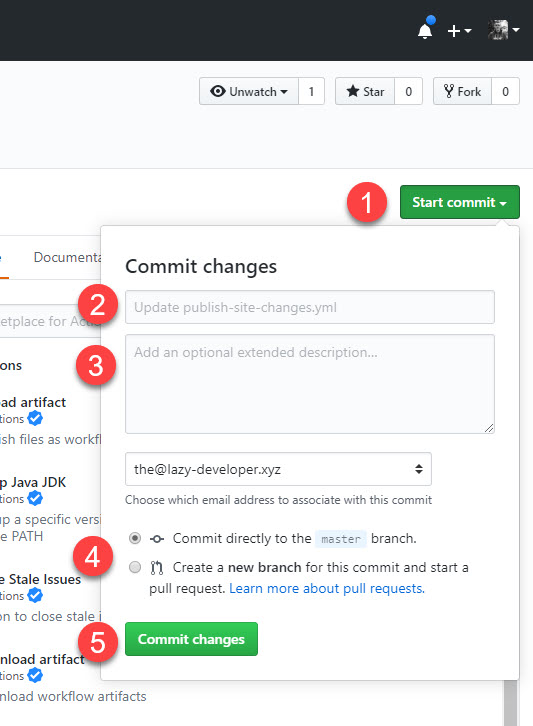
Now that you have added that you can
- Click on Start commit.
- Enter a commit message or leave blank to use the watermark text
- Optionally add a description
- Select if you want this change to go straight into master or a new branch
- Click Commit changes
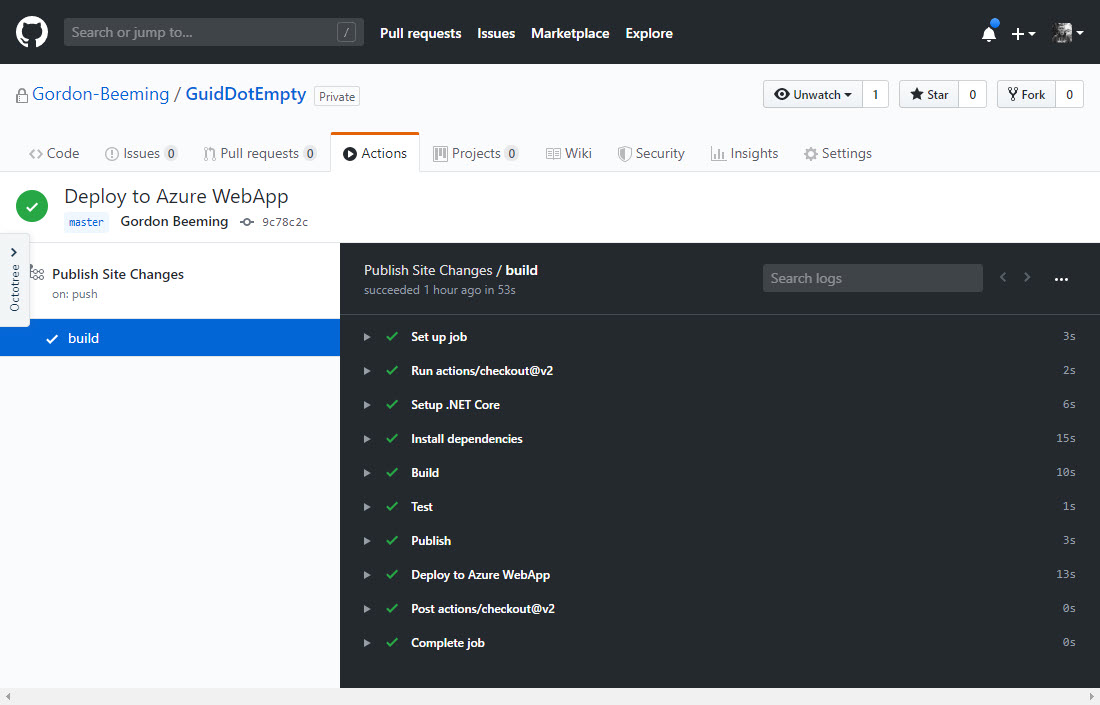
If you left the workflow as in the example and committed to master you should see in the actions that a run has started and if you click into it you'll see the output in your browser and should land up being successful like below
#Conclusion
Actions are really easy to use and you can trigger them off a lot of events in GitHub. In our case we used the push action using the parameter branches targeting the master branch.
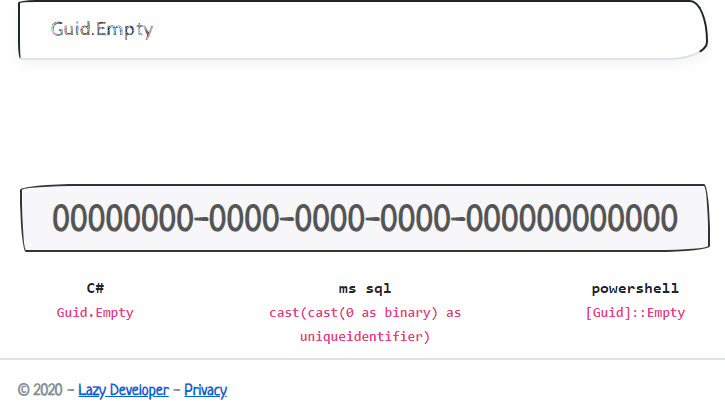
The code that I was publishing above can be found in GitHub in my GuidDotEmpty project and the published site is at https://00000000-0000-0000-0000-000000000000.xyz/.
Have you been playing with Actions? Have any feedback or have you done any interesting things with it? Share with me on Twitter @GordonBeeming or below in the comments 😁