How to lower the real cost of a SQL Server Virtual Machine in Azure

On this page3 sections ▾
Whenever you take out an Azure VM you generally get a single disk which is not that big, when you select a SQL Server based VM (even web edition) you automatically get a 1TB disk, if you are using managed disks you pay for that whole TB even if you are only using 1GB of it. This post will show you how you can lower the price of that virtual machine if you are in this situation
#What are we stating with?
At the moment what we have is a brand new virtual machine created using the SQL Server 2019 Web on Windows Server 2019 - Gen1 image

with a default setup using managed disks you get a 1TB Standard SSD which you need to pay for the full usage of each month which if you not using it all is costly (considering you are paying monthly and not using it 😀)
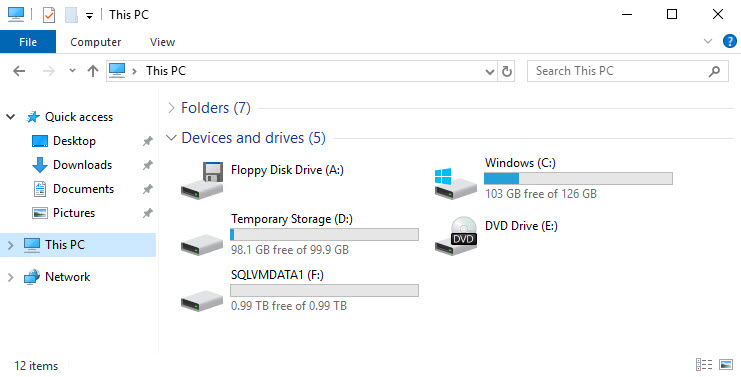
So how do we make this cheaper?
#Lowering the cost of a managed disk in Azure
In order for us to achieve this we need to make the disk smaller, making the disk smaller is not super straight forward because you can't shrink a disk but once you know how it's easy enough to do 😊. So what we are going to need to do is
- Add a new managed disk to the virtual machine
- Copy data across
- Shut down the server
- Remove the managed disk from the virtual machine
- Power the machine back on
- Change the disk letter of the disk we added earlier
So let's go 😊
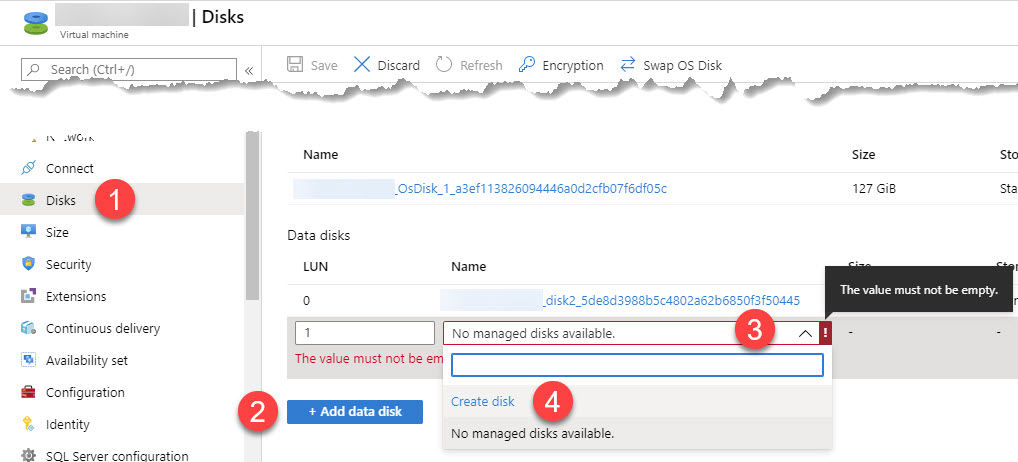
From the Azure Portal navigate to your machine and click Disks, then Add data disk, open the name drop list and then Create disk
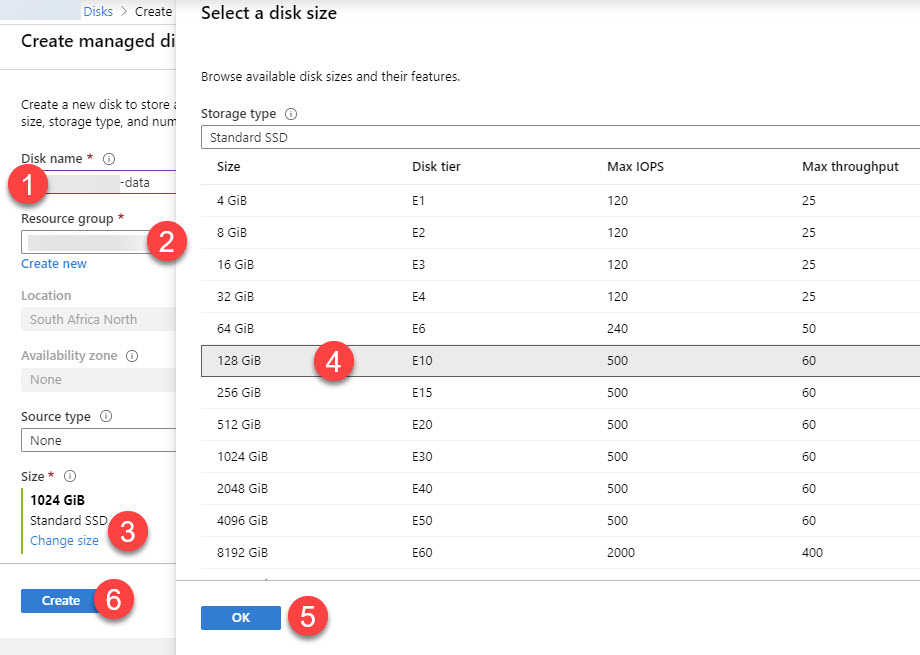
Enter a name for the new data disk, the resource group should already be selected, click on Change size and select a new data disk size. Remember that you are able to extend a data disk so if you select something too small you can always expand it later. Click OK and then Create
Click Save
Back in the virtual machine open up Disk Manager by right clicking on the windows button and then Disk Management
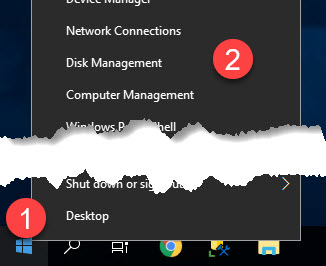
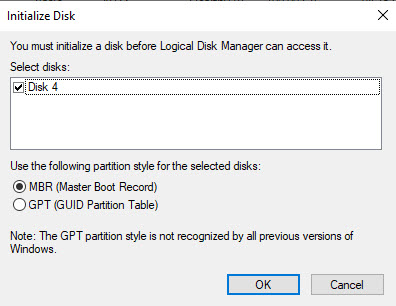
When disk management opens click OK on the Initialize Disk window
Right click on the new disk and click New Simple Volume...
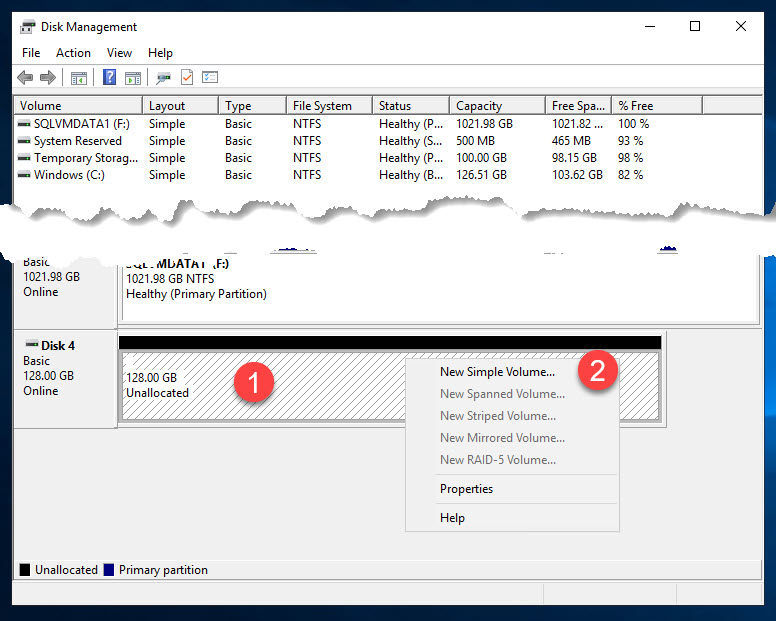
You can configure specifics if you have for the new disk, but Next, Next, Next, Next, Finish should be 100% fine 😀.
Open an Admin CMD window and run the following script, this assumes you did next next finish the dialog so the new drive is mapped to drive E. This script disables the SQL Server service, stops it and then copies all the files across
sc config "MSSQLSERVER" start= disabled
sc stop "MSSQLSERVER"
robocopy F:\ E:\ *.* /j /e /sec /Xo /Xd "System Volume Information" "$RECYCLE.BIN"
You'll notice that this takes a very quick assuming this was still a new server otherwise it would take time relative to how much data is on the drive of course to run and will give you an output like below
Microsoft Windows [Version 10.0.17763.1098]
(c) 2018 Microsoft Corporation. All rights reserved.

C:\Users\TsAdmin>sc config "MSSQLSERVER" start= disabled
[SC] ChangeServiceConfig SUCCESS

C:\Users\TsAdmin>sc stop "MSSQLSERVER"
[SC] ControlService FAILED 1062:

The service has not been started.


C:\Users\TsAdmin>robocopy F:\ E:\ *.* /j /e /sec /Xo /Xd "System Volume Information" "$RECYCLE.BIN"

-------------------------------------------------------------------------------
   ROBOCOPY     ::     Robust File Copy for Windows
-------------------------------------------------------------------------------

  Started : Friday, March 27, 2020 7:06:20 PM
   Source : F:\
     Dest : E:\

    Files : *.*

 Exc Dirs : System Volume Information
            $RECYCLE.BIN

  Options : *.* /S /E /DCOPY:DA /COPY:DATS /J /XO /R:1000000 /W:30

------------------------------------------------------------------------------

                           0    F:\
                           0    F:\data\
                           0    F:\log\
                           0    F:\tempDb\
                           2    F:\tempDb\Data\
                           1    F:\tempDb\Log\

------------------------------------------------------------------------------

               Total    Copied   Skipped  Mismatch    FAILED    Extras
    Dirs :         8         0         8         0         0         0
   Files :         3         0         3         0         0         0
   Bytes :   24.00 m         0   24.00 m         0         0         0
   Times :   0:00:00   0:00:00                       0:00:00   0:00:00
   Ended : Friday, March 27, 2020 7:06:20 PM
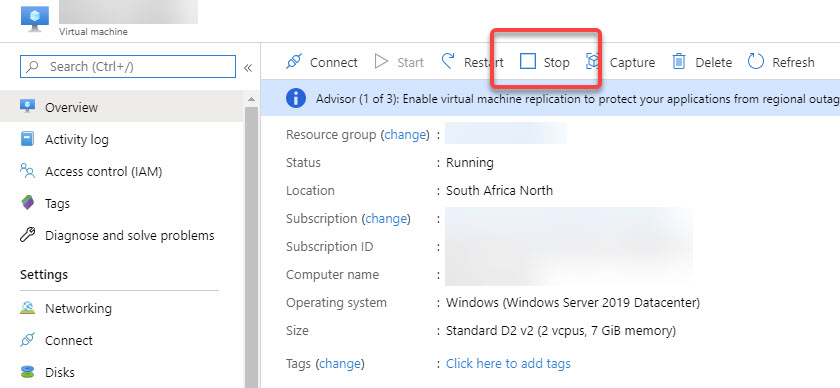
At this point we can head to the Azure Portal and stop the virtual machine so we can remove the extra disk, when asked if you want to stop the machine click yes
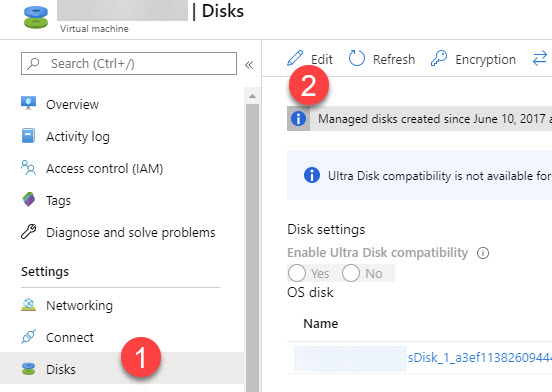
On the Disks section click Edit
Click the ellipse on the old disk and then click Detach and Save
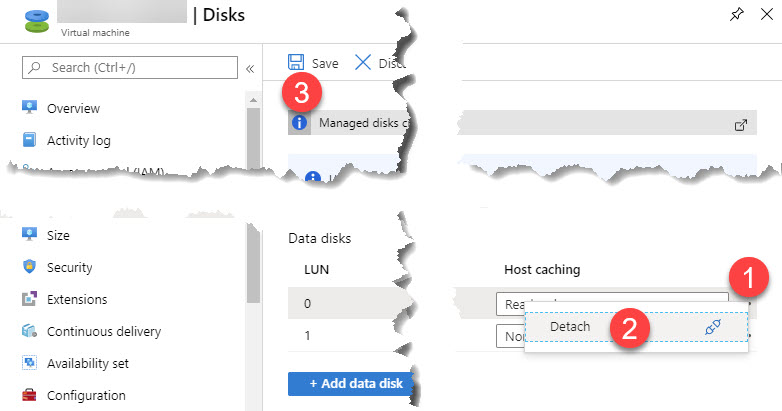
Back on the Overview tab click Start to start the machine back up

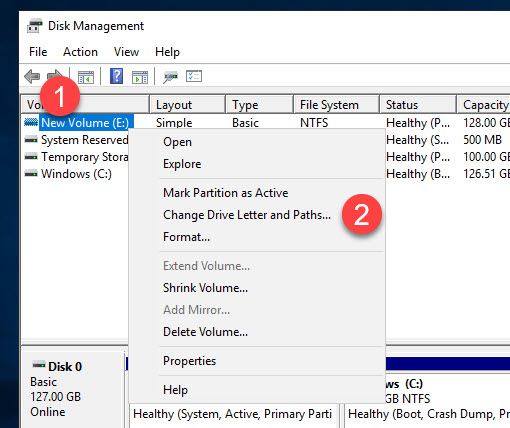
Connect back to your virtual machine and open Disk Management again. Right click on the drive and then click on Change Drive Letter and Paths...
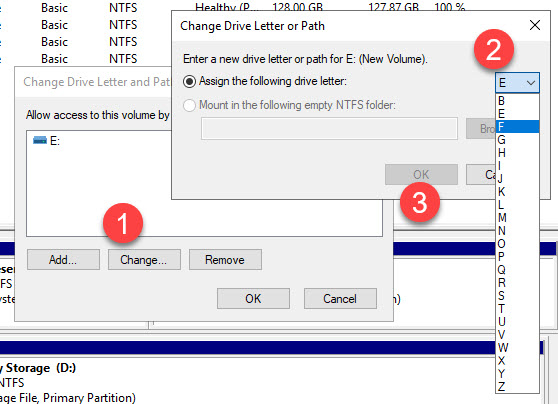
Click the Change button, Change the drive letter to F (this was the drive of the previous drive), Click OK and then when you ask if you are sure because some apps may break, click Yes
Things are all ready to go now. Open and admin CMD window again and run the script below
sc config "MSSQLSERVER" start= auto
sc start "MSSQLSERVER"
this will set the SQL Server service mode back to auto and will start the service with an output like below
Microsoft Windows [Version 10.0.17763.1098]
(c) 2018 Microsoft Corporation. All rights reserved.

C:\Users\TsAdmin>sc config "MSSQLSERVER" start= auto
[SC] ChangeServiceConfig SUCCESS

C:\Users\TsAdmin>sc start "MSSQLSERVER"

SERVICE_NAME: MSSQLSERVER
        TYPE               : 10  WIN32_OWN_PROCESS
        STATE              : 2  START_PENDING
                                (NOT_STOPPABLE, NOT_PAUSABLE, IGNORES_SHUTDOWN)
        WIN32_EXIT_CODE    : 0  (0x0)
        SERVICE_EXIT_CODE  : 0  (0x0)
        CHECKPOINT         : 0x0
        WAIT_HINT          : 0x7d0
        PID                : 5964
        FLAGS              :
After a reboot to make sure things are all happy you are good to go to use that machine 😁.
While the machine is rebooting remember to delete the old disk, or maybe check that you are happy with how the machine is working and then delete the disk.
#Conclusion
Admittedly this is another post to remind me how I've done this in the past, I keep on keep notes for it but don't document it in the 1 place I'll be able to find it in the future 😀
I hope this was helpful for you as I know it will be to me in the future 😅