A Guide to Mastering GitHub Copilot on github.com

On this page5 sections ▾
Most of us have used GitHub Copilot in the IDE for real-time coding suggestions. But there's a different way to use it that a lot of developers skip past: assigning it entire tasks, from issue to pull request, directly on github.com.
Working with Copilot on the GitHub platform is a different skill set. It's less about autocompleting single lines and more about managing whole units of work. Get this right and you can offload the tedious stuff, stay focused on harder problems, and move faster overall.
#The foundation: your copilot:instructions
Before you can use Copilot for entire tasks, you need to set the ground rules. The most important step is creating a .github/copilot/instructions file. This file tells Copilot the conventions, patterns, and quirks of your project.
Here's the part I like: you don't have to write it from scratch. The first time you ask @copilot to follow instructions it doesn't have, it will ask you to create the file first. It gives you a link that pre-populates an issue, which you can then assign back to @copilot to write the initial draft for you.

Comment | Issue Created | PR Created
Once you have a base, you can make it self-improving. Add something like this to your instructions:
If I ever say "we do something like this", "don't do that", or "do this instead", please update these instructions to reflect that feedback for future work.
Every piece of feedback you give then fixes the current PR and carries forward to the next one.
#Writing good PBIs
To get useful results from Copilot, you need to give it clear instructions. A vague request leads to a vague PR, and then you're stuck going back and forth instead of making progress.
Here's an example of a "bad" PBI that is likely to fail (or at least require more feedback and refinement):
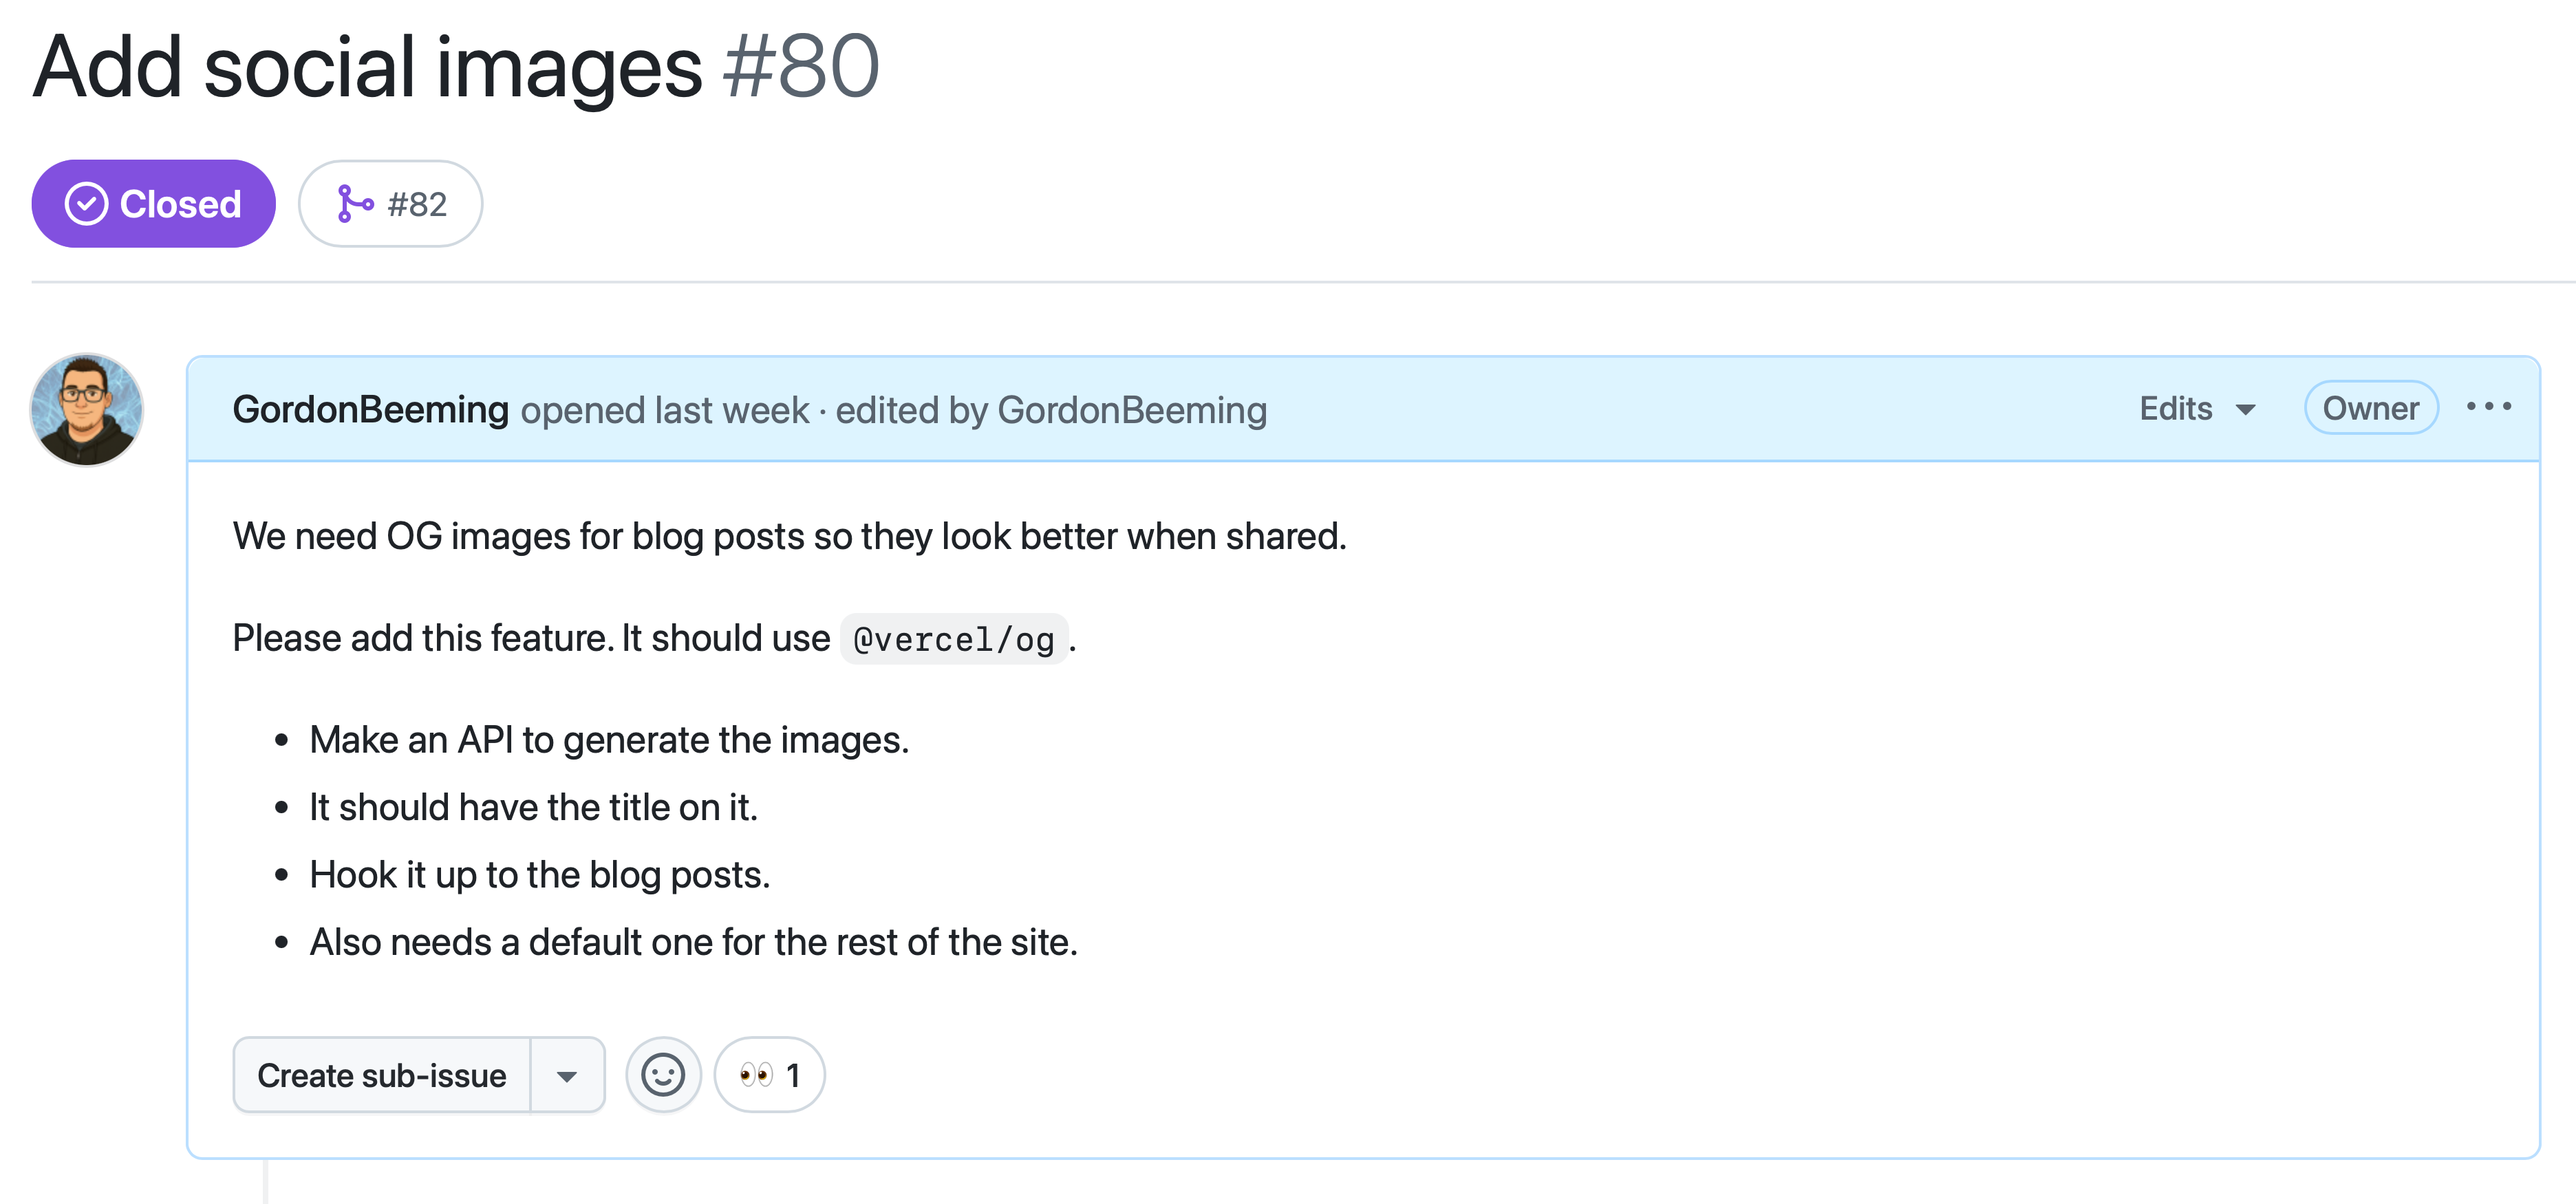
That fails because it forces Copilot to guess at file paths, image sizes, branding, and specific logic. You will not like what it guesses.
Here's what the same feature looks like as a well-written PBI:
A quick tip: use whatever AI chatbot you prefer to help you write these. You can hammer out requirements in plain text long before any code gets written, which is much cheaper than fixing things later. GitHub Copilot also has local prompt files if you want to go further, but that's a separate topic.

The more context and constraints you provide upfront, the better the result. This matters most for new features where Copilot has no existing code to learn from.
#Parallelizing your work
Some tasks are just tedious. They're necessary, but not exactly where you want to be spending your afternoon. Adding a readonly flag to an entity is a good example. That change has to go through every layer of the application: the domain, the API, the UI, and all the tests that go with it.
Copilot handles this kind of work well. It's good at wide-reaching but repetitive changes, and it's solid at updating existing tests to match. It can adjust unit tests for a changed method signature, update integration tests to assert on the new API response, and fix UI test selectors for a newly disabled input.
While Copilot is threading that readonly flag through the codebase, you can be in your IDE working on actual hard problems. Even if Copilot gets the UI 80% right, you've still come out ahead. Pull down the branch, spend five minutes fixing up a couple of things, and merge. That's a good trade.
#Giving feedback that actually works
Once Copilot submits a PR, how you give feedback makes a real difference. The most common mistake is drip-feeding comments one at a time.
Here's why that's a problem: as soon as you mention @github-copilot in a comment, it starts working on that single piece of feedback. Once it's done, it picks up your next comment as a separate job. That first change was made without the context of everything else you wanted, so now you're fixing the fix. It adds up.
Batch your feedback instead. Take an extra minute to gather all your thoughts into one numbered comment:

You can also add screenshots to your comments, and Copilot can see them. Drawing a red box around the specific element you're talking about is often faster and clearer than trying to describe it in words.
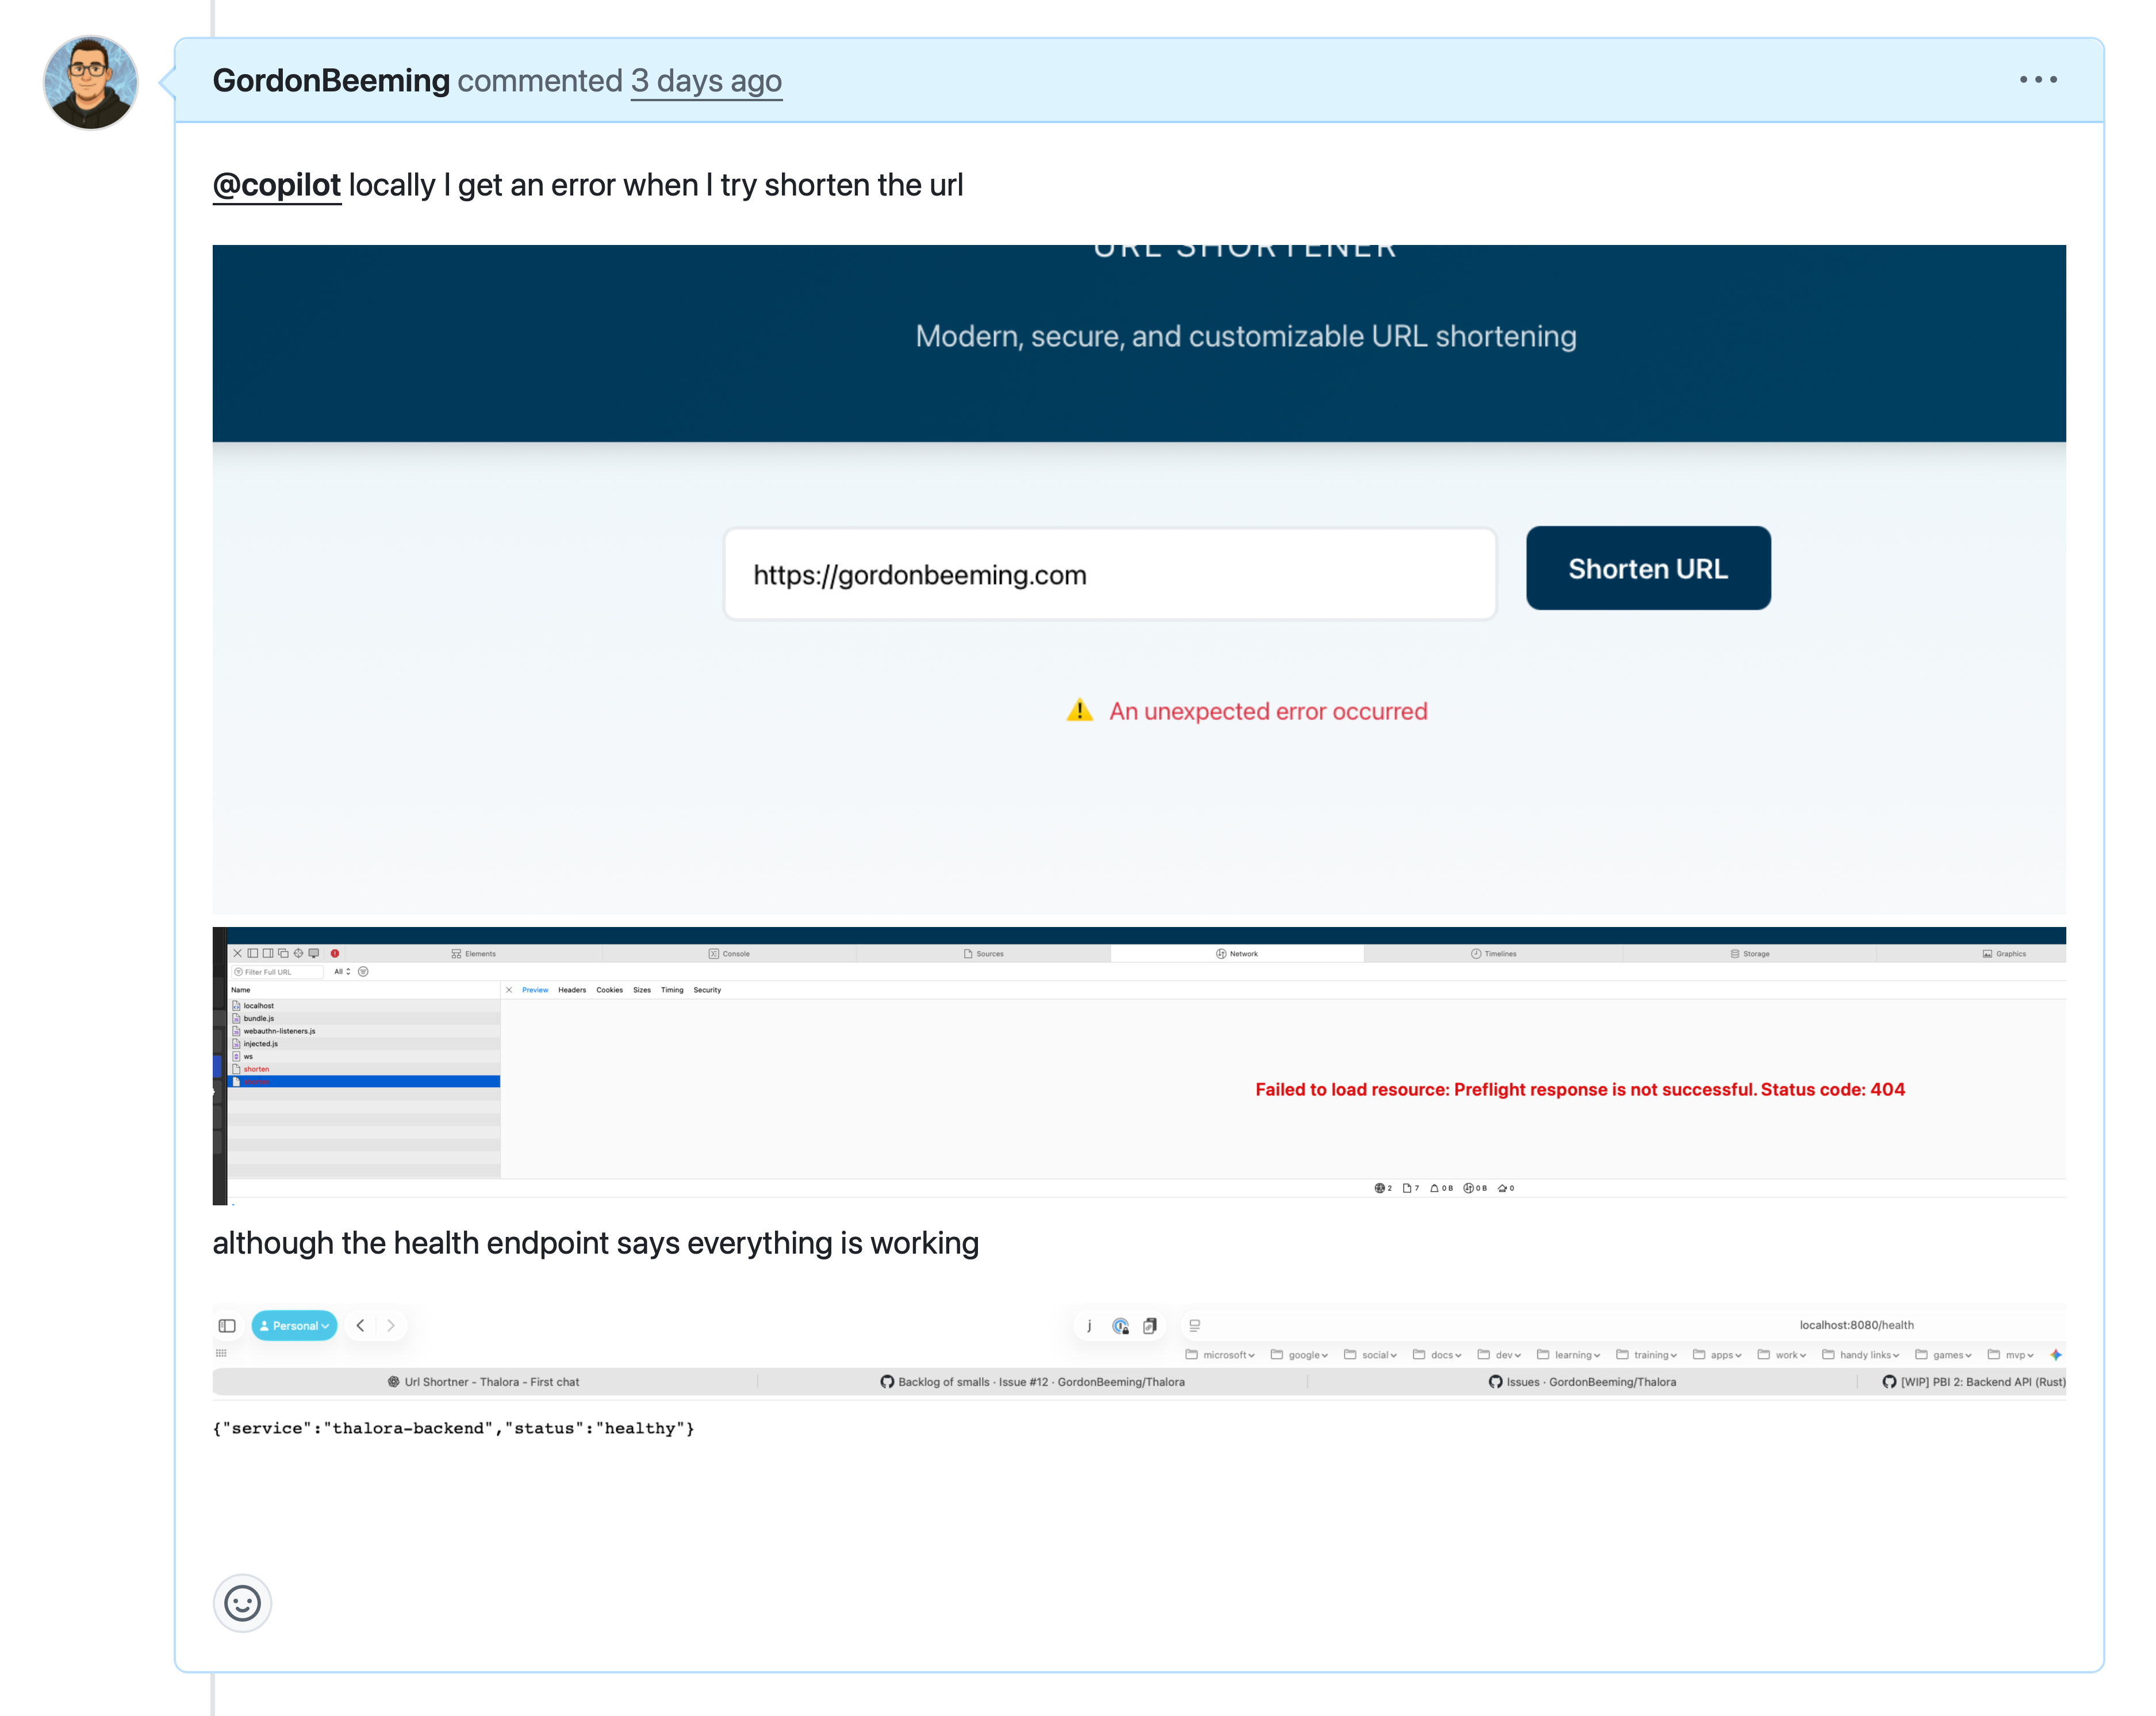
Giving Copilot the full picture before it starts saves you multiple review rounds.
#Wrapping up
Using Copilot on github.com is genuinely a different skill than using it in the IDE. It takes a bit of setup and a change in how you think about work, but once it clicks it's hard to go back.
Good instructions, specific PBIs, and batched feedback are really all it takes. Get those three things right and Copilot stops being a coding assistant and starts being a teammate that handles the boring parts while you work on the interesting ones.